crwdns2933423:0crwdne2933423:0

crwdns2942213:0crwdne2942213:0

crwdns2935311:0crwdnd2935311:0crwdne2935311:0 crwdns2935313:0Asus Transformer Pad Infinitycrwdnd2935313:0crwdnd2935313:0crwdne2935313:0

  1. Asus Transformer Pad Infinity Teardown, Asus Transformer Pad Infinity Teardown: crwdns2935265:01crwdnd2935265:01crwdnd2935265:01crwdne2935265:0
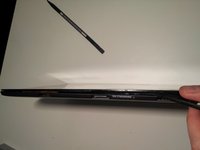
    • First, turn the power off

  2. Asus Transformer Pad Infinity Teardown: crwdns2935265:02crwdnd2935265:01crwdnd2935265:03crwdne2935265:0 Asus Transformer Pad Infinity Teardown: crwdns2935265:02crwdnd2935265:02crwdnd2935265:03crwdne2935265:0 Asus Transformer Pad Infinity Teardown: crwdns2935265:02crwdnd2935265:03crwdnd2935265:03crwdne2935265:0
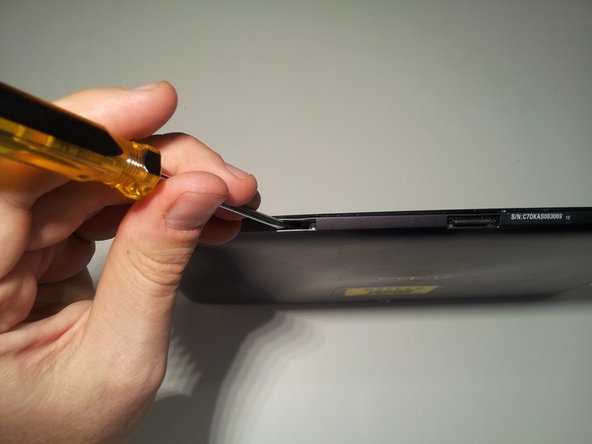
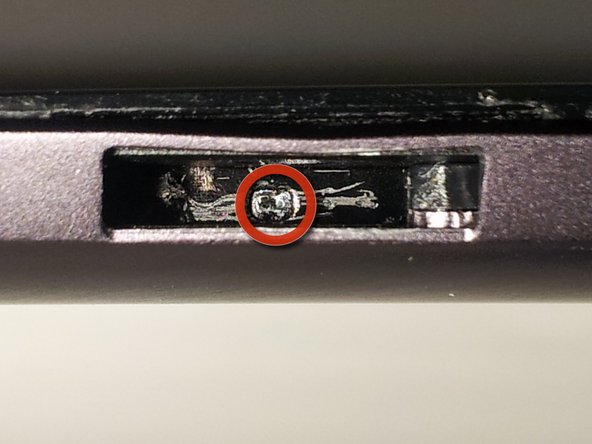
    • Insert a small flat head screwdriver into the 2 docking station guide ports on the bottom of the tablet.

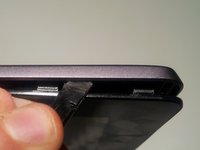
    • Unlock screen casing tabs

    • Push tab with screwdriver to the right until it clicks

    • You should see a small arrow in the bottom of the port

    • Unlock the tabs in both docking station guide ports.

  3. Asus Transformer Pad Infinity Teardown: crwdns2935265:03crwdnd2935265:01crwdnd2935265:03crwdne2935265:0 Asus Transformer Pad Infinity Teardown: crwdns2935265:03crwdnd2935265:02crwdnd2935265:03crwdne2935265:0 Asus Transformer Pad Infinity Teardown: crwdns2935265:03crwdnd2935265:03crwdnd2935265:03crwdne2935265:0
    • Use spudger to push upward on the small plastic tabs on top of the docking station guide ports.

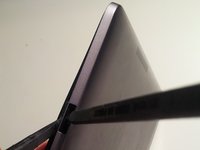
    • Insert the flat side of another spudger to start freeing the bottom of the screen from the case.

  4. Asus Transformer Pad Infinity Teardown: crwdns2935265:04crwdnd2935265:01crwdnd2935265:03crwdne2935265:0 Asus Transformer Pad Infinity Teardown: crwdns2935265:04crwdnd2935265:02crwdnd2935265:03crwdne2935265:0 Asus Transformer Pad Infinity Teardown: crwdns2935265:04crwdnd2935265:03crwdnd2935265:03crwdne2935265:0
    • Use your spudger to open the four plastic tabs located on either side of the tablet.

    • These tabs are very fragile.

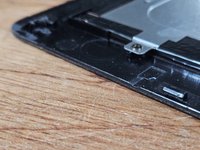
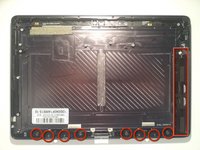
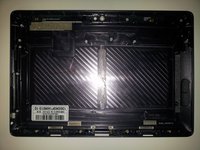
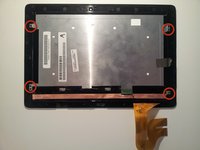
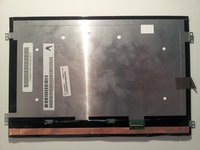
    • Remove the screen from the body

  5. Asus Transformer Pad Infinity Teardown: crwdns2935265:05crwdnd2935265:01crwdnd2935265:02crwdne2935265:0 Asus Transformer Pad Infinity Teardown: crwdns2935265:05crwdnd2935265:02crwdnd2935265:02crwdne2935265:0
    • There is an internal power switch next to the battery connector, that will kill power to the entire device while you're working on it.

    • Don't forget to switch it back on when you're reassembling!

  6. Asus Transformer Pad Infinity Teardown: crwdns2935265:06crwdnd2935265:01crwdnd2935265:03crwdne2935265:0 Asus Transformer Pad Infinity Teardown: crwdns2935265:06crwdnd2935265:02crwdnd2935265:03crwdne2935265:0 Asus Transformer Pad Infinity Teardown: crwdns2935265:06crwdnd2935265:03crwdnd2935265:03crwdne2935265:0
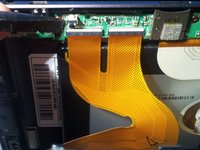
    • Use your spudger to release the two digitizer ribbon cables from the mainboard.

    • Located on the left side of the tablet between the micro-HDMI and the microSD slot.

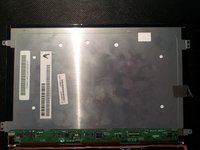
    • Use your spudger to release the LCD cable from the back of the LCD.

    • Set aside for later dissection.

  7. Asus Transformer Pad Infinity Teardown: crwdns2935265:07crwdnd2935265:01crwdnd2935265:03crwdne2935265:0 Asus Transformer Pad Infinity Teardown: crwdns2935265:07crwdnd2935265:02crwdnd2935265:03crwdne2935265:0 Asus Transformer Pad Infinity Teardown: crwdns2935265:07crwdnd2935265:03crwdnd2935265:03crwdne2935265:0
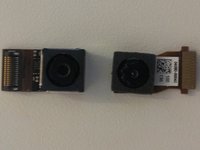
    • To remove the front facing camera (right):

    • Use your spudger to unlock the ribbon cable

    • Slide the camera out

    • To remove the rear facing camera (top):

    • Apply light lifting pressure to unplug it from it's socket

    • Remove the backup battery on the right side:

    • Unplug the cable from the motherboard with your spudger

  8. Asus Transformer Pad Infinity Teardown: crwdns2935265:08crwdnd2935265:01crwdnd2935265:03crwdne2935265:0 Asus Transformer Pad Infinity Teardown: crwdns2935265:08crwdnd2935265:02crwdnd2935265:03crwdne2935265:0 Asus Transformer Pad Infinity Teardown: crwdns2935265:08crwdnd2935265:03crwdnd2935265:03crwdne2935265:0
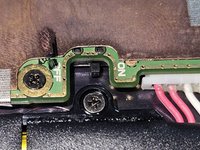
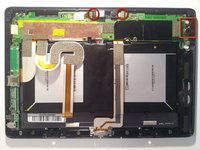
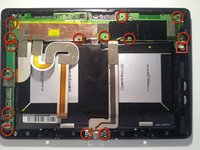
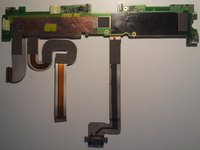
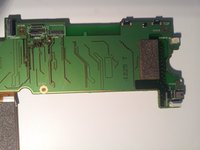
    • Remove the motherboard, daughterboard, and dock connector

    • Unscrew 14 points

    • Unplug the speaker from the motherboard before removing it

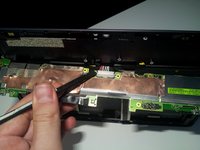
    • Reveal the battery connector:

    • Flip the motherboard from the top edge of the tablet down (towards the battery).

    • Unplug with light pressure from your spudger.

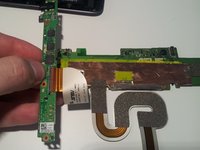
    • Disconnect the motherboard from the daughterboard:

    • Unlock the ribbon cable on the back side of the daughterboard
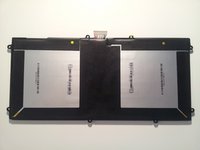
  9. Asus Transformer Pad Infinity Teardown: crwdns2935265:09crwdnd2935265:01crwdnd2935265:03crwdne2935265:0 Asus Transformer Pad Infinity Teardown: crwdns2935265:09crwdnd2935265:02crwdnd2935265:03crwdne2935265:0 Asus Transformer Pad Infinity Teardown: crwdns2935265:09crwdnd2935265:03crwdnd2935265:03crwdne2935265:0
    • Remove the battery:

    • Remove screws (eight)

    • Use your spudger underneath the battery between the 2 cells to work it free
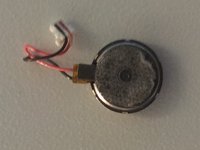
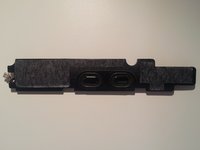
  10. Asus Transformer Pad Infinity Teardown: crwdns2935265:010crwdnd2935265:01crwdnd2935265:03crwdne2935265:0 Asus Transformer Pad Infinity Teardown: crwdns2935265:010crwdnd2935265:02crwdnd2935265:03crwdne2935265:0 Asus Transformer Pad Infinity Teardown: crwdns2935265:010crwdnd2935265:03crwdnd2935265:03crwdne2935265:0
    • Remove the speaker:

    • Use your spudger underneath, and work it free

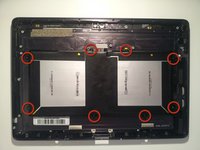
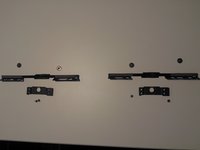
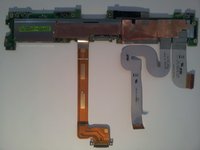
    • Remove the bottom screen locking mechanism:

    • Remove screws (eight)

    • Lift pieces out

  11. Asus Transformer Pad Infinity Teardown: crwdns2935265:011crwdnd2935265:01crwdnd2935265:03crwdne2935265:0 Asus Transformer Pad Infinity Teardown: crwdns2935265:011crwdnd2935265:02crwdnd2935265:03crwdne2935265:0 Asus Transformer Pad Infinity Teardown: crwdns2935265:011crwdnd2935265:03crwdnd2935265:03crwdne2935265:0
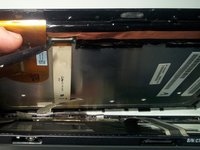
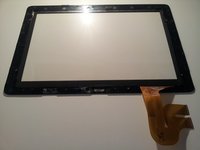
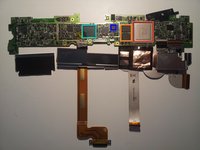
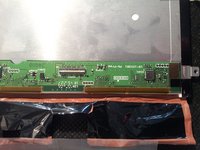
    • Now that we're left with a boring empty shell, let's return to the LCD assembly that we set aside in Step 5.

    • Remove the 4 screws. Then work your spudger underneath the edges of the LCD to separate it from the Gorilla Glass front. It has a light adhesive around all edges.

  12. Asus Transformer Pad Infinity Teardown: crwdns2935265:012crwdnd2935265:01crwdnd2935265:02crwdne2935265:0 Asus Transformer Pad Infinity Teardown: crwdns2935265:012crwdnd2935265:02crwdnd2935265:02crwdne2935265:0
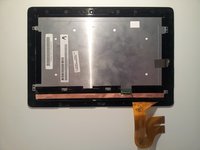
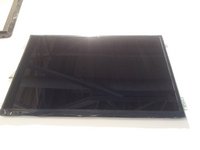
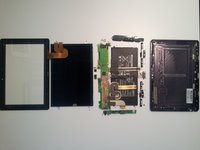
    • With the LCD free, you should now be able to lay it out in a big pile of parts and the teardown is complete. Now let's see what's under all those heatsinks and tape.

  13. Asus Transformer Pad Infinity Teardown: crwdns2935265:013crwdnd2935265:01crwdnd2935265:02crwdne2935265:0 Asus Transformer Pad Infinity Teardown: crwdns2935265:013crwdnd2935265:02crwdnd2935265:02crwdne2935265:0
    • The back side of the motherboard

  14. Asus Transformer Pad Infinity Teardown: crwdns2935265:014crwdnd2935265:01crwdnd2935265:03crwdne2935265:0 Asus Transformer Pad Infinity Teardown: crwdns2935265:014crwdnd2935265:02crwdnd2935265:03crwdne2935265:0 Asus Transformer Pad Infinity Teardown: crwdns2935265:014crwdnd2935265:03crwdnd2935265:03crwdne2935265:0
    • Motherboard backside closeups

  15. Asus Transformer Pad Infinity Teardown: crwdns2935265:015crwdnd2935265:01crwdnd2935265:02crwdne2935265:0 Asus Transformer Pad Infinity Teardown: crwdns2935265:015crwdnd2935265:02crwdnd2935265:02crwdne2935265:0
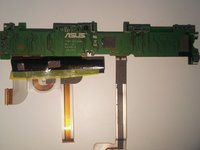
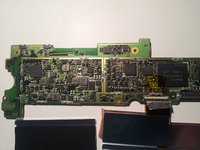
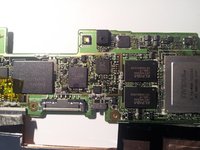
    • The front side of the motherboard is where all the action is.

    • Tegra 3 quad core processor T33-P-A3

    • 2x Elpida memory J4216EBBG-GNL-F

    • Realtek? ALCS631

    • Hynix H26M64002BNR e-NAND

  16. Asus Transformer Pad Infinity Teardown: crwdns2935265:016crwdnd2935265:01crwdnd2935265:03crwdne2935265:0 Asus Transformer Pad Infinity Teardown: crwdns2935265:016crwdnd2935265:02crwdnd2935265:03crwdne2935265:0 Asus Transformer Pad Infinity Teardown: crwdns2935265:016crwdnd2935265:03crwdnd2935265:03crwdne2935265:0
    • Front side motherboard closeups

  17. Asus Transformer Pad Infinity Teardown: crwdns2935265:017crwdnd2935265:01crwdnd2935265:02crwdne2935265:0 Asus Transformer Pad Infinity Teardown: crwdns2935265:017crwdnd2935265:02crwdnd2935265:02crwdne2935265:0
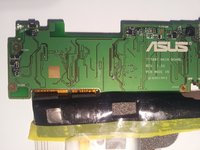
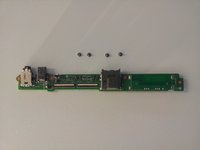
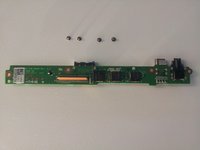
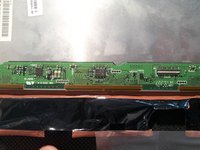
    • Front and back of the daughterboard.
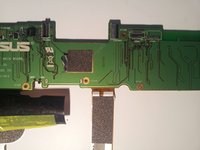
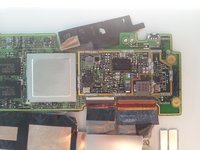
  18. Asus Transformer Pad Infinity Teardown: crwdns2935265:018crwdnd2935265:01crwdnd2935265:02crwdne2935265:0 Asus Transformer Pad Infinity Teardown: crwdns2935265:018crwdnd2935265:02crwdnd2935265:02crwdne2935265:0
    • The back of the LCD.

  19. Asus Transformer Pad Infinity Teardown: crwdns2935265:019crwdnd2935265:01crwdnd2935265:03crwdne2935265:0 Asus Transformer Pad Infinity Teardown: crwdns2935265:019crwdnd2935265:02crwdnd2935265:03crwdne2935265:0 Asus Transformer Pad Infinity Teardown: crwdns2935265:019crwdnd2935265:03crwdnd2935265:03crwdne2935265:0
    • Close-ups.

    • That's all I've got. I apologize for any blurry pics as all I had on hand was my cell phone ( <3 Samsung Galaxy Note.) I hope your teardowns are far less destructive than mine was. Good Luck.

    • ...and yes, it still works after reassembly. Thanks for asking.

Matt

crwdns2935283:008/29/12crwdne2935283:0

497 crwdns2915208:0crwdne2915208:0

crwdns2935295:0crwdne2935295:0

crwdns2947412:033crwdne2947412:0

Does anyone know what the internal on/off switch does on the motherboard? Right next to the battery connector. How can you see that in a tear down and not mention it?

Jcortes1982 - crwdns2934203:0crwdne2934203:0

It is a master on/off switch. When the switch is flipped to the off position, the tablet will not operate. You can see the switch labels on the second picture of Step 13.

Matt -

Ya its for when your doing work inside the tablet your supposed to flick that off so you dont accidentally short anything. Like the on/off switch on your power supply on the back of your desktop

Jon Pileot -

Thanks for this teardown! Could the "mushy" power / volume buttons be due to poor placement of the buttons / board? Could slight nudging of the board in one direction or the other help the "mushy" buttons?

Jon Pileot - crwdns2934203:0crwdne2934203:0

Hi there, thank you very much for this teardown. I wanted to inquire if you were able to find out anything about the gyroscopes/accelerometers/GPS and other sensors during this. I'm doing a project and this would be very helpful information.

Johnathon - crwdns2934203:0crwdne2934203:0

crwdns2917038:0crwdne2917038:0

crwdns2936625:0crwdne2936625:0:

crwdns2936751:024crwdne2936751:0 2

crwdns2936753:07crwdne2936753:0 11

crwdns2936753:030crwdne2936753:0 99

crwdns2942667:0crwdne2942667:0 100,764