crwdns2915892:0crwdne2915892:0
Apple definitely snuck away some interesting tidbits inside -- things they didn't want people to know prior to release. Initially we thought the battery was going to be difficult to take out, but boy were we wrong!
crwdns2942213:0crwdne2942213:0
-
-
This unit combines all the daily functions of a PDA (word processing, datebooks, contacts, to-do lists, etc.) with raw computing power placed directly underneath your fingertips.
-
-
-
The left, right, and back portions of the MessagePad 2000 box.
-
It's nice to see a product box with an intensive amount of information. In contrast to Apple's recent designs, which are mostly decorative, the MessagePad 2000's box is highly informational.
-
-
-
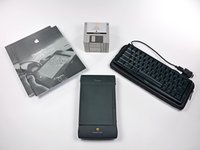
Contents of the box:
-
Apple Newton MessagePad 2000.
-
User Reference Manuals
-
Ginormous stack of floppy disks containing the required software and drivers
-
Newton Keyboard with carrying case
-
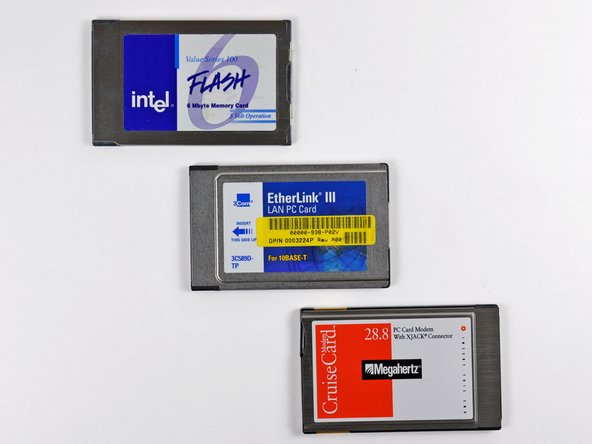
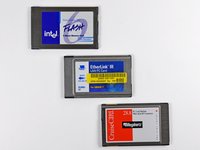
The Newton also interfaces with PC cards through its two internal slots. This allows the use of LAN and external memory cards concurrently.
-
-
-
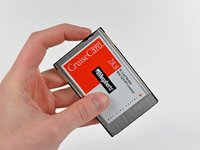
Imagine the joy in our hearts when we discovered this nifty PCMCIA Modem card with an XJACK connector.
-
-
-
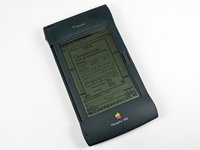
The MessagePad 2000 measures in at 1.1 x 4.7 x 8.3 inches, and weighing a measly 1.4 lbs.
-
It features a monochrome, backlit LCD measuring 4.9 x 3.9 inches, capable of providing resolutions of 480 x 320 pixels.
-
The standard operating system on the MessagePad 2000 was the Newton OS 2.1. Other features include:
-
Built-in speaker and microphone.
-
Dual-mode infrared transceiver for wireless data transfer.
-
Two Type II PC Card slots.
-
Nonglare resistive tablet and stylus pen.
-
-
-
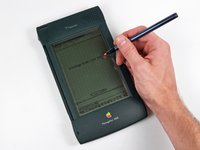
The MessagePad 2000's preloaded planner and note-taking features are definitely geared toward the business professionals of its day.
-
Using the stylus has a bit of a learning curve, but is overall very intuitive.
-
This particular MessagePad has MorsePad, which converts strings of text into Morse code. Samuel Morse would be jealous.
-
The awesomely '90s monochromatic backlight helps illuminate the Newton in low-light situations.
-
-
-
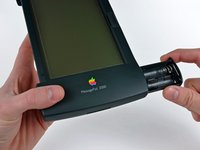
Open the battery compartment by pulling on the small release lever and pull the battery compartment straight away from the outer case.
-
The MessagePad 2000 requires four AA (LR6) alkaline batteries.
-
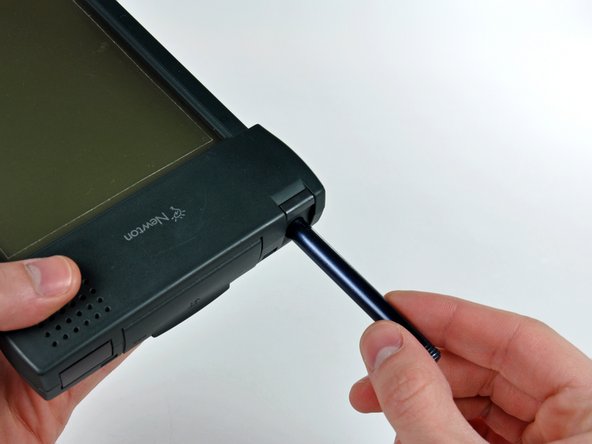
Pull the stylus capacitive pen away from its recess in the case.
-
-
-
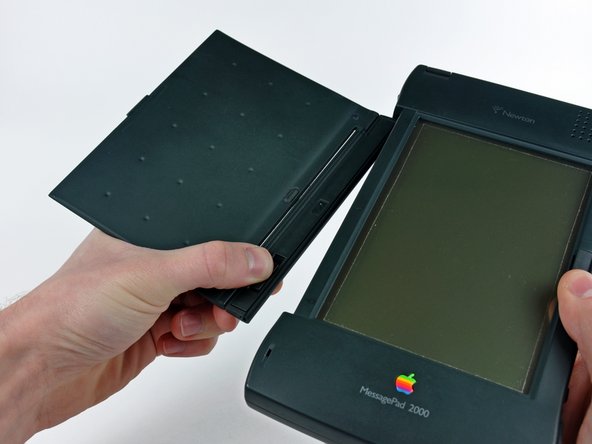
Push the sliding tab attached to the inner hinge of the display cover toward the top of the Newton.
-
Pull the bottom edge of the display cover away from the outer case and remove it from the Newton.
-
-
-
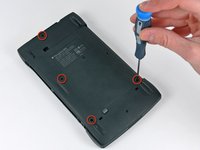
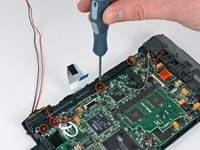
Remove the four 12 mm Phillips screws securing the rear case to the Newton.
-
-
-
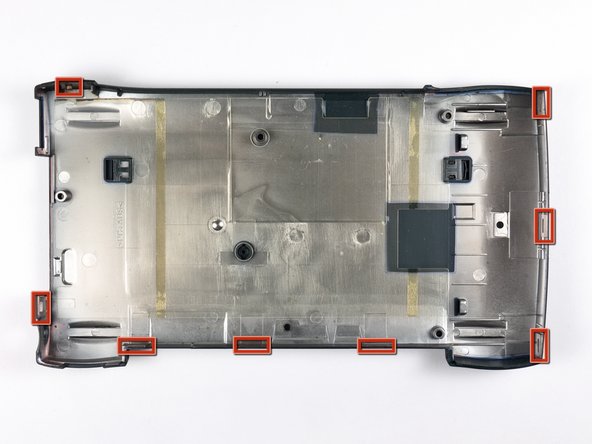
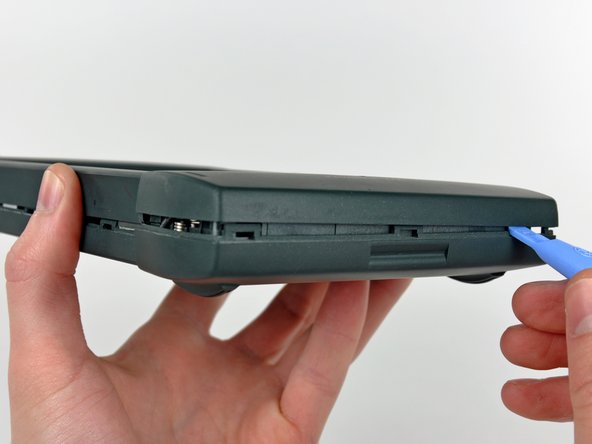
Beginning with the seam where the display cover used to be attached, use a plastic opening tool to release the three clips along the power button side of the Newton.
-
Continue prying along the left side of the Newton and proceed to free the clips along the Newton's lower edge.
-
-
-
-
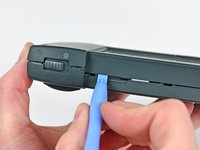
Use the edge of a plastic opening tool to pry the rear case away from the Newton near the stylus opening.
-
-
-
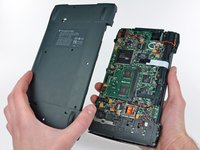
After much (careful) wiggling and prying, the rear case lifts right off the Newton.
-
-
crwdns2935267:0crwdne2935267:0Tweezers$4.99
-
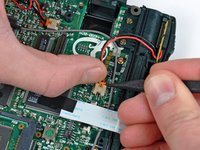
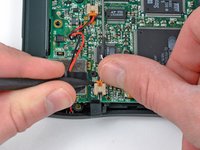
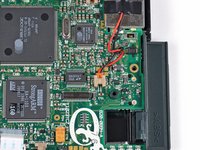
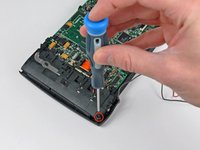
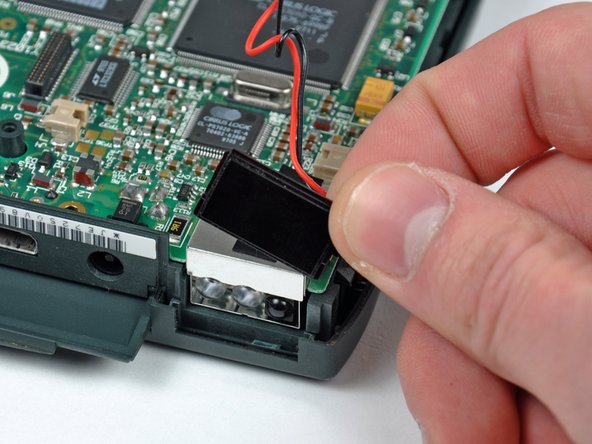
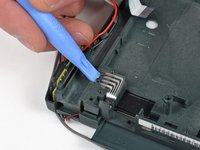
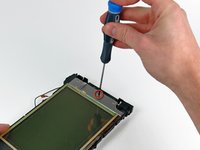
Before removing the stylus holder, disconnect the power button and backlight connectors from the logic board.
-
-
-
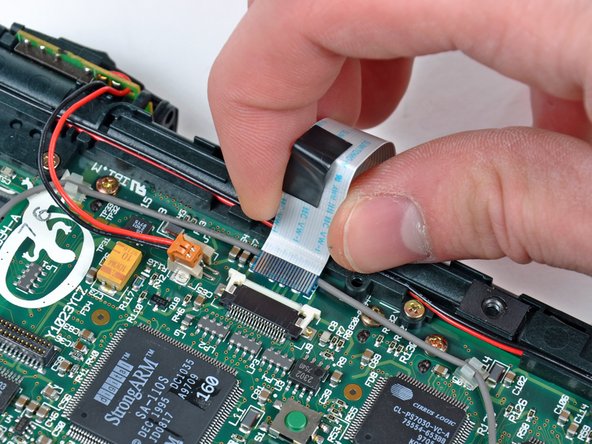
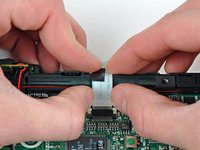
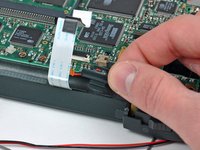
Use your thumbnails to slide the lock on the ZIF display data cable socket toward the edge of the Newton.
-
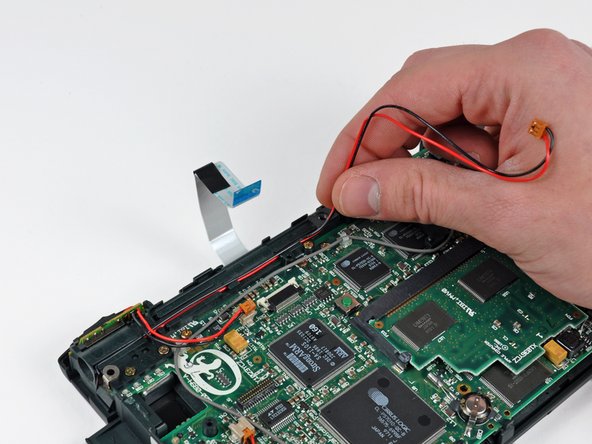
Pull the display data cable out of its socket.
-
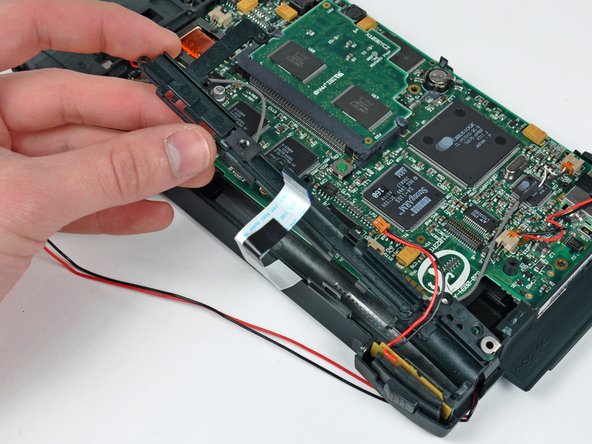
De-route the display backlight cables from the channel in the black plastic stylus holder.
-
-
-
Remove the four 6.3 mm Phillips screws securing the black plastic stylus holder to the Newton.
-
Carefully lift the stylus holder out of the Newton.
-
-
-
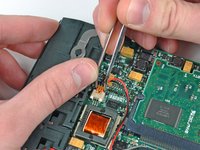
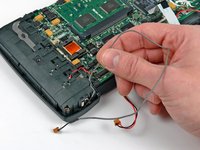
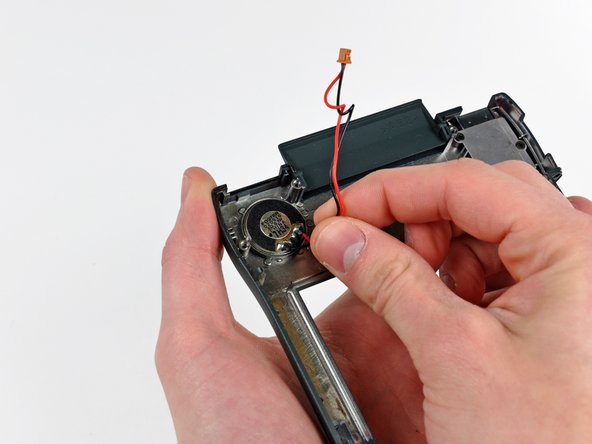
Disconnect the speaker and microphone cables, being careful not to break their sockets off the logic board.
-
De-route the speaker cable and move it away from the logic board.
-
-
-
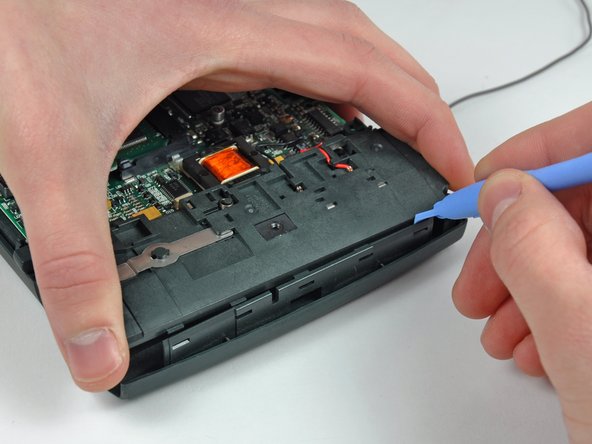
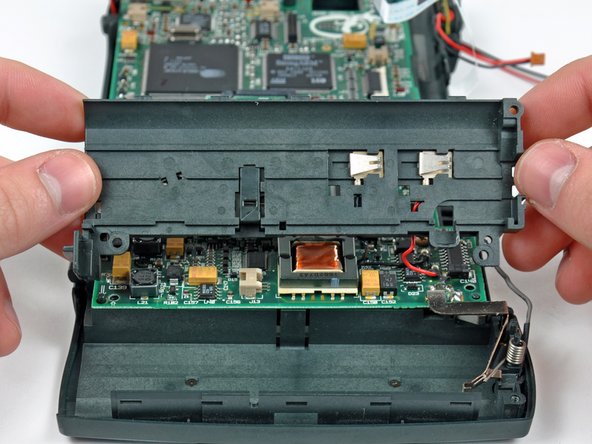
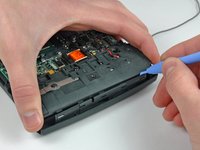
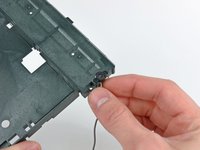
Remove the single 6.3 mm Phillips screw securing the upper half of the battery compartment to the Newton.
-
While lightly lifting the upper half of the battery compartment, use the edge of a plastic opening tool to release the five clips along its outer edge.
-
Lift the upper half of the battery compartment and gently lay it on the logic board.
-
-
-
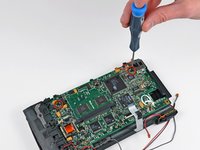
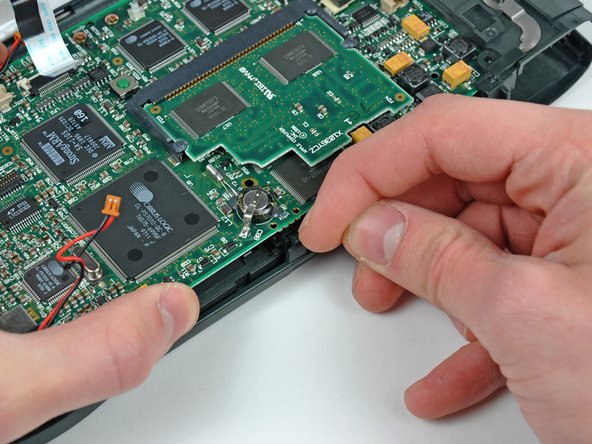
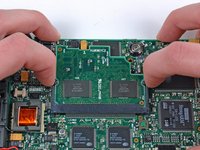
Remove the two black 3 mm Phillips screws securing the logic board to the inner case.
-
While holding the ground arm stationary with one hand, use a pair of tweezers to lift the ground spring off its plastic post on the inner case.
-
-
-
Before tilting the Newton around too much, remove the several small plastic pieces around its perimeter. These include:
-
The retaining clip near the stylus holder.
-
The small square blank cover under the AC adapter/keyboard connector flap.
-
The IR lens along the Newton's top edge.
-
-
-
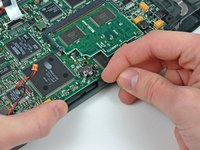
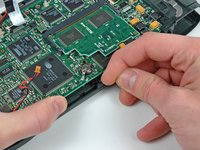
Carefully pull the plastic retaining clip holding the logic board to the inner case near the ROM chip away from the center of the Newton.
-
Lift the logic board to separate it from the inner case.
-
-
-
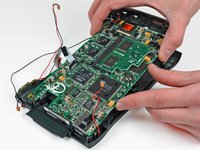
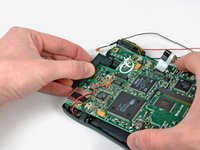
Carefully lift the logic board from its lower edge, making sure not to bend it in the process.
-
Pull the plastic cover away from the AC adapter/keyboard ports for enough clearance to remove the logic board.
-
-
-
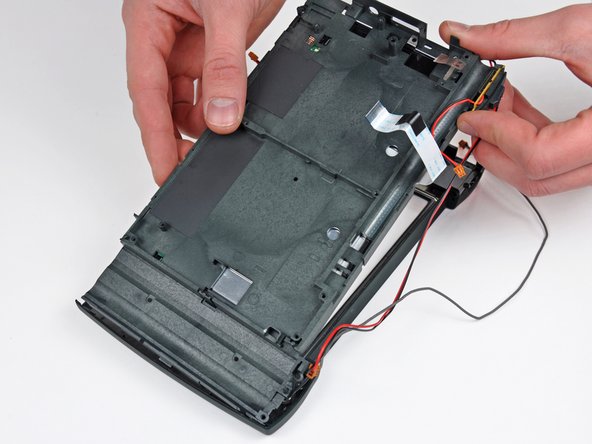
Use the edge of a plastic opening tool to carefully lift the digitizer ribbon cable off the two positioning pegs on the inner case.
-
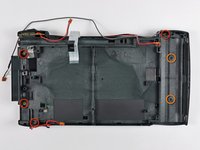
Remove the following screws securing the inner case to the front case:
-
Four 6.3 mm Phillips
-
Two 3 mm Phillips
-
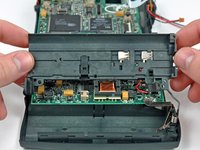
Pull the same retaining tab used to secure the logic board away from the center of the Newton to release the inner case, then pull it away from the bottom of the Newton and set it aside.
-
-
-
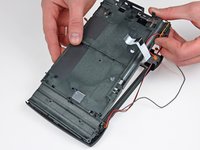
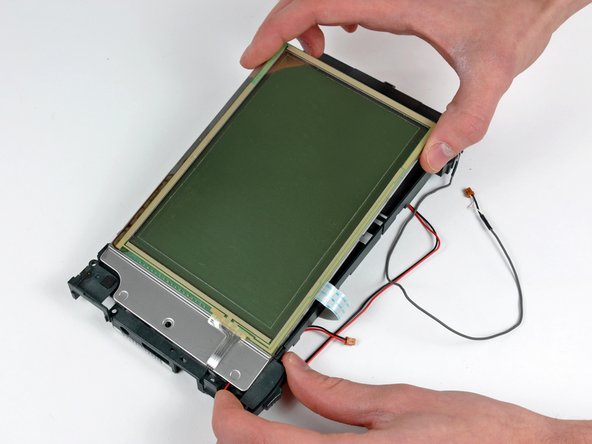
Remove the single 3 mm Phillips screw securing the front of the display to the inner case.
-
Flip the inner case over and use one hand to release the plastic retaining clip while pressing the display out of the inner case.
-
Lift the display out of the inner case, minding the fragile digitizer and display ribbon cables.
-
-
-
Lift the microphone off its mounting pins on the inner case.
-
Remove the speaker from the front case.
-
The 20 mm 8 Ohm, .3 W speaker provides the Newton's mono sound.
-
-
-
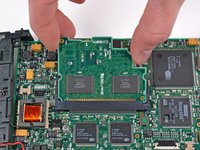
Pull the two retaining arms away from the center of the ROM chip to release it from the logic board.
-
Pull the ROM chip out of its socket on the logic board.
-
-
-
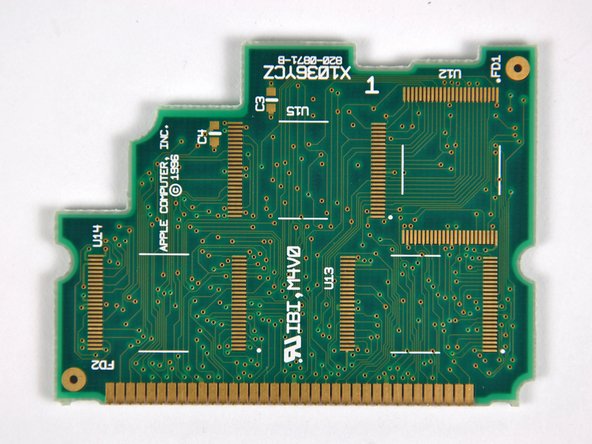
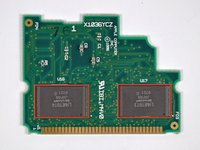
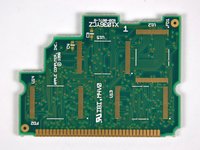
Front and back pictures of the mask ROM board:
-
Two LHME5BT3 Sharp mask ROM chips.
-
Each chip is 4 MB of mask ROM, for a grand total of 8 MB of mask ROM! Shocking...we know...
-
The reverse of the mask ROM board looks to have space for four more chips.
-
-
-
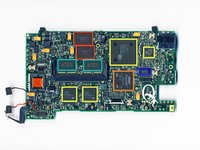
Major players on the board include:
-
Two Sharp LH28F016SUT 2MB Flash ROM
-
DEC's 162 MHz StrongARM SA-110S 32 bit ARM Processor
-
Cirrus Logic's PS 7010/20/30 CPU Subsystem, Analog, and PCMCIA controllers, respectively
-
Hitachi's HM51W426OCLTT7 DRAM
-
Linear Technology's LTC1323 AppleTalk Transceiver
-
-
-
As always, the final layout shot of our finished process.
-
Our hunger for an Apple tablet teardown has been satisfied for the moment. The countdown has begun for the ever elusive Apple iPad.
-
The time has come once again when we must part ways, but worry not, for we will be reunited again soon.
-
Adios!
-


crwdns2947412:02crwdne2947412:0
Hi Guys! I'm happy to send you one of the Apple Replacement Pens for this Newton, if you promise change photos in steps 5-7 ;-)
Wow. You have had a Newton Pen for almost 5 years and nobody noticed. Put in eBay, so anybody can buy them.