crwdns2915892:0crwdne2915892:0
A research grade activity monitor produced by PAL Technologies Ltd. that is strapped to the thigh using an adhesive patch and quantifies physical activity for up to 14 days with data stored on the device. This device was procured for $1000 AUD and provided to us by a research institute. More information on the device can be found here.
crwdns2942213:0crwdne2942213:0
crwdns2936621:0crwdne2936621:0
-
-
With no user interface, this device is built for purpose. Strapped to the thigh using an adhesive patch, this device continuously measures movement and position of the limb to calculate physical activity intensity, storing data locally on the device for upto 14 days (as per their claims) .
-
Width: 35mm
-
Length: 54.7mm
-
Height: 7mm
-
-
-
The casing consists of two injection molded plastic parts which have been sealed with an adhesive. To open the device, the parts were heated with a hair dryer to loosen the adhesive. Then a prying pick was used to release the two parts. Prying was started at the micro-USB port and then used all around the seam.
-
Inside the device, there was a battery and a PCB placed side-by-side.
-
The device communicates through a micro-USB port. It is not a water-resistance device as the USB port is exposed.
-
-
-
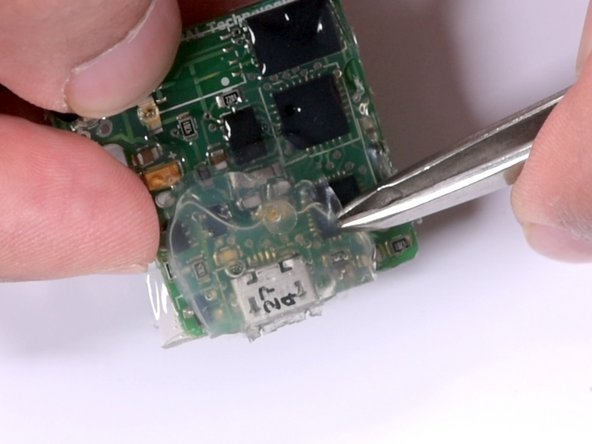
The PCB had been covered in a layer of EVA-based hot glue to protect the components from moisture and any liquid which may damage it.
-
The glue would also help in holding the connections and components in place within the casing.
-
-
-
crwdns2935267:0crwdne2935267:0Tweezers$4.99
-
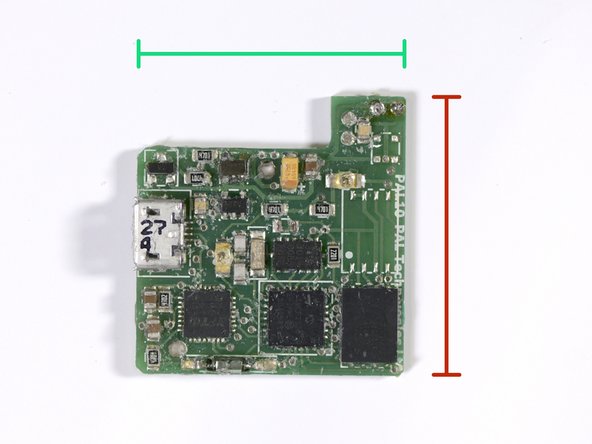
The EVA glue was removed by scraping using a plastic spudger and then pulling the glue off using tweezers.
-
Width: 29mm
-
Length: 30mm
-
-
-
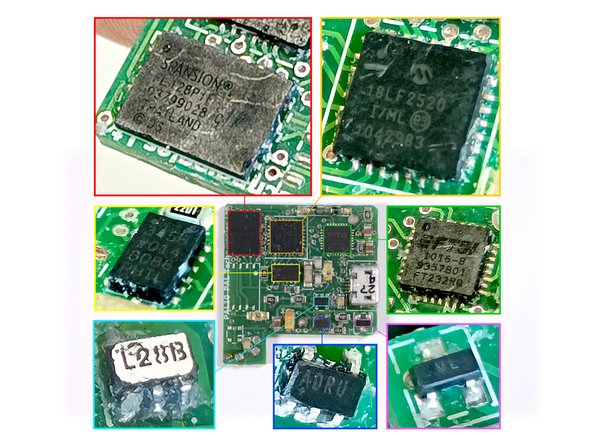
The following components were identified on the PCB:
-
Spansion FL128PIF (Flash memory)
-
Microchip 18LF2520 (MCU)
-
Analog Devices ADXL345 (MEMS Accelerometer)
-
FTDI FT232R (USB UART IC)
-
L28B (Voltage regulator IC) Either Texas Instruments or Diodes Inc.
-
ADRU (Battery charging IC)
-
ML (Hall effect sensor for magnetic pull detection)
-
-
-
The device is powered by a 3.7V 250mAh Lithium Polymer battery
-
Length: 29mm
-
Width: 20mm
-
Thickness: 5.5mm
-
The battery had a PCB connected to it containing two components:
-
8205A 1011HC (5A 20V N-Channel MOSFET)
-
DW01 (Battery management IC)
-
This module protects the battery from over-charging and over-discharging, allowing a stable power supply to the device.
-
-
-
That is the full product disassembled!
-
In terms of repairability, it is possible to open the casing without damaging it, but it requires the tools listed in this teardown. It can then be glued back together with a glue gun or super glue.
-
The battery is soldered onto the PCB, so replacing the battery requires a soldering kit. This is also true for replacing ICs or components on the PCB.
-
The device comes with a charging dock for upto 10 devices, but the micro-USB port should allow direct connectivity with computers for data transfer and charging.
-