crwdns2933423:0crwdne2933423:0

crwdns2942213:0crwdne2942213:0

crwdns2935311:0crwdnd2935311:0crwdne2935311:0 crwdns2935313:0AVerMedia Live Streamer NEXUS AX310crwdnd2935313:0crwdnd2935313:0crwdne2935313:0

  1. AVerMedia NEXUS AX310 Teardown, Remove rubbers: crwdns2935265:01crwdnd2935265:01crwdnd2935265:02crwdne2935265:0 AVerMedia NEXUS AX310 Teardown, Remove rubbers: crwdns2935265:01crwdnd2935265:02crwdnd2935265:02crwdne2935265:0
    • Remove rubbers (red). They are pretty dense so to not worry to damage them. Do not remove label (blue) - it have hole under, but it is not a screw hole

  2. AVerMedia NEXUS AX310 Teardown, Screw remove: crwdns2935265:02crwdnd2935265:01crwdnd2935265:01crwdne2935265:0
    • Remove 6 PH1 screws. Need to notice, that upper 3 screws are deep - so you need long thin screwdriver.

  3. AVerMedia NEXUS AX310 Teardown, Latches: crwdns2935265:03crwdnd2935265:01crwdnd2935265:03crwdne2935265:0 AVerMedia NEXUS AX310 Teardown, Latches: crwdns2935265:03crwdnd2935265:02crwdnd2935265:03crwdne2935265:0 AVerMedia NEXUS AX310 Teardown, Latches: crwdns2935265:03crwdnd2935265:03crwdnd2935265:03crwdne2935265:0
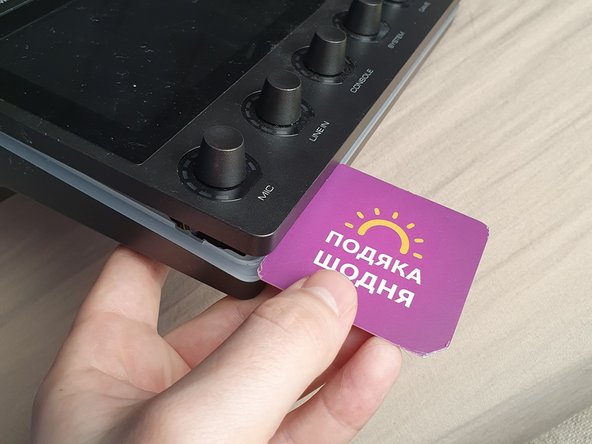
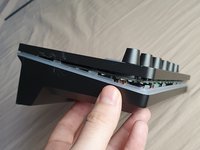
    • Unclick latches using long side of credit card. I recomend this because latches are really strong and not flexible, so this wat to do this will help to keep them alive

    • You need to do this above rgb line

    • Do both sides and bottom, after that upper side will free itself.

    • Do not pull upper half of streamer as it connected to bottom with wires

  4. AVerMedia NEXUS AX310 Teardown, Bottom wire: crwdns2935265:04crwdnd2935265:01crwdnd2935265:02crwdne2935265:0 AVerMedia NEXUS AX310 Teardown, Bottom wire: crwdns2935265:04crwdnd2935265:02crwdnd2935265:02crwdne2935265:0
    • Lift bottom side and make colorful wire visible and acceseble

    • Unplug it. This part do not have any clips, so gust push it down

  5. AVerMedia NEXUS AX310 Teardown, Unplug screen wire: crwdns2935265:05crwdnd2935265:01crwdnd2935265:02crwdne2935265:0 AVerMedia NEXUS AX310 Teardown, Unplug screen wire: crwdns2935265:05crwdnd2935265:02crwdnd2935265:02crwdne2935265:0
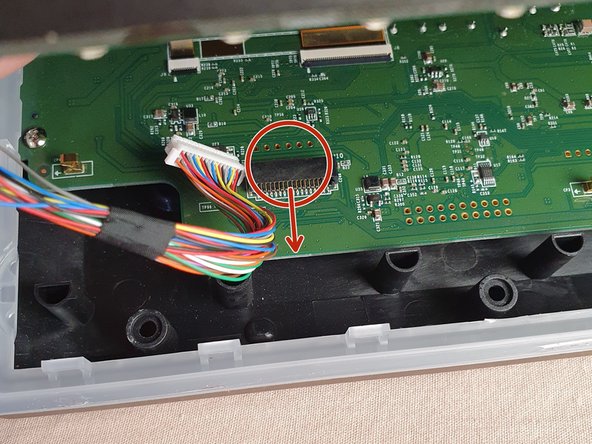
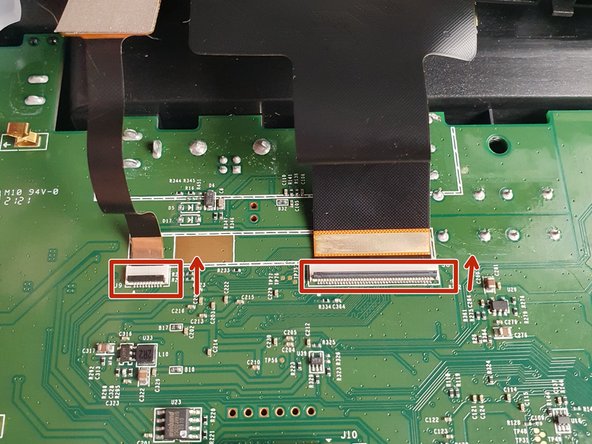
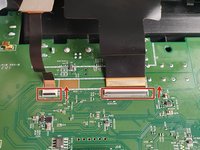
    • Flip bottom half of streamer more and make display and touchscreen plumes visible

    • Remove black isolation (if you have it) on bottom pcb

    • Lift black lockers

    • Remove plumes

  6. AVerMedia NEXUS AX310 Teardown, Upper part screw remove: crwdns2935265:06crwdnd2935265:01crwdnd2935265:02crwdne2935265:0 AVerMedia NEXUS AX310 Teardown, Upper part screw remove: crwdns2935265:06crwdnd2935265:02crwdnd2935265:02crwdne2935265:0
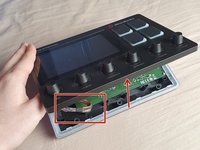
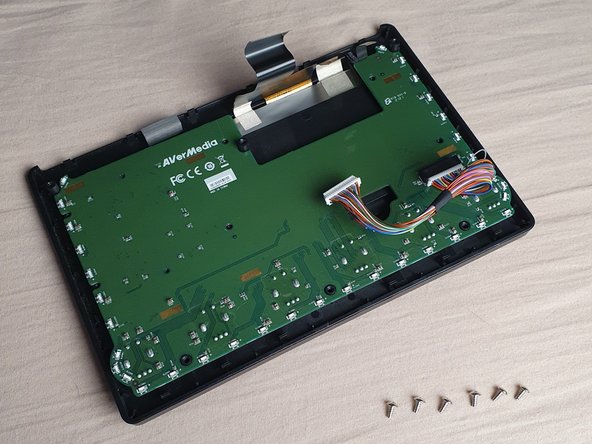
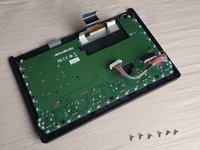
    • Remove 6 PH1 screws on top

    • Im done on this, because my goal was to check any marks on screen. I think to fully remove top pcb you need to remove bottom parts of audio spinnerы but i cannot do it

havrilyuk

crwdns2935283:003/14/23crwdne2935283:0

158 crwdns2915208:0crwdne2915208:0

crwdns2935295:0crwdne2935295:0

crwdns2947410:01crwdne2947410:0

crwdns2917038:0crwdne2917038:0

crwdns2936625:0crwdne2936625:0:

crwdns2936751:024crwdne2936751:0 0

crwdns2936753:07crwdne2936753:0 0

crwdns2936753:030crwdne2936753:0 9

crwdns2942667:0crwdne2942667:0 603