crwdns2933423:0crwdne2933423:0

Changement charnière droite why! L140/1PU

crwdns2942213:0crwdne2942213:0
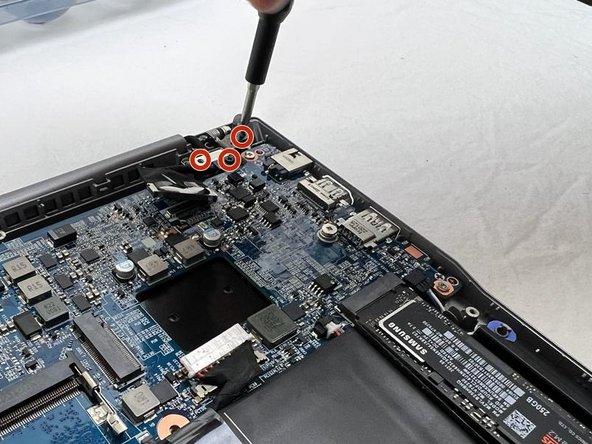
  1. Changement charnière droite why! L140/1PU, Couvert: crwdns2935265:01crwdnd2935265:01crwdnd2935265:02crwdne2935265:0 Changement charnière droite why! L140/1PU, Couvert: crwdns2935265:01crwdnd2935265:02crwdnd2935265:02crwdne2935265:0
    • Dévisser les vis

    • Soulever le couvert

  2. Changement charnière droite why! L140/1PU, Débrancher: crwdns2935265:02crwdnd2935265:01crwdnd2935265:02crwdne2935265:0 Changement charnière droite why! L140/1PU, Débrancher: crwdns2935265:02crwdnd2935265:02crwdnd2935265:02crwdne2935265:0
    • Pour des questions de sécurité, il faut débrancher la batterie avant chaque manipulation.

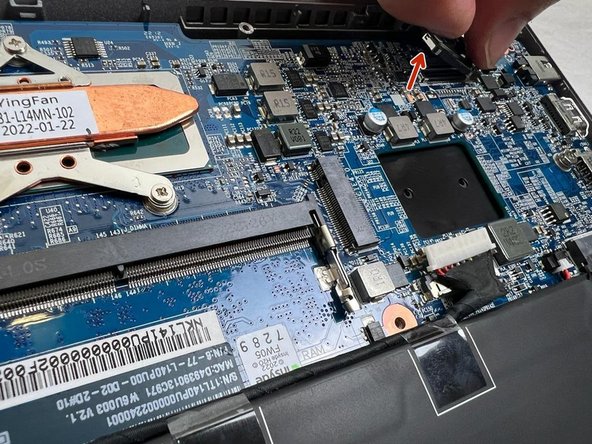
    • Débrancher la batterie avec vos doigts.

    • Les autres composants peuvent maintenant être remplacé en toute sécurité.

  3. Changement charnière droite why! L140/1PU, Cadre sup. 1: crwdns2935265:03crwdnd2935265:01crwdnd2935265:03crwdne2935265:0 Changement charnière droite why! L140/1PU, Cadre sup. 1: crwdns2935265:03crwdnd2935265:02crwdnd2935265:03crwdne2935265:0 Changement charnière droite why! L140/1PU, Cadre sup. 1: crwdns2935265:03crwdnd2935265:03crwdnd2935265:03crwdne2935265:0
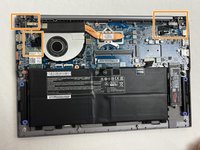
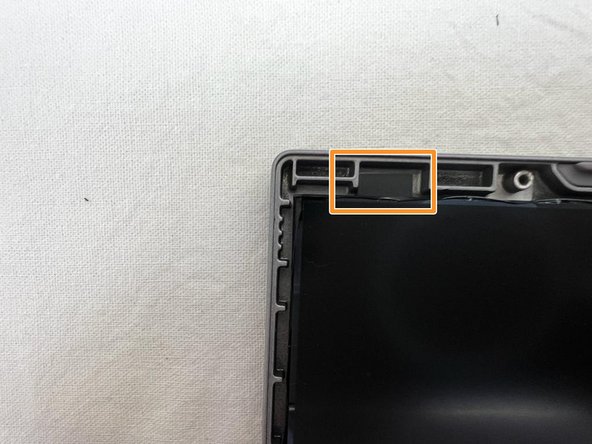
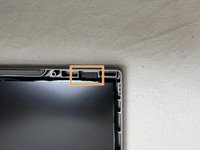
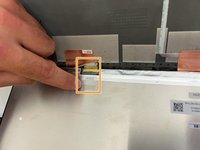
    • Encadré en orange, les zones sur lesquels nous allons nous focaliser.

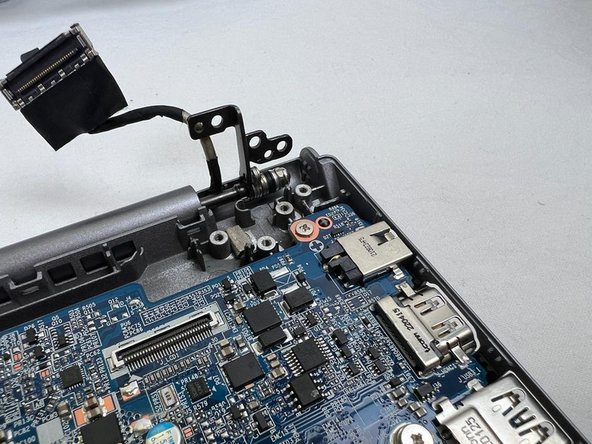
    • Débrancher le câble de l'écran.

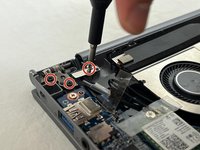
    • Dévisser la vis du cache et celles de la charnière. Enlever le cache.

  4. Changement charnière droite why! L140/1PU, Cadre sup. 2: crwdns2935265:04crwdnd2935265:01crwdnd2935265:03crwdne2935265:0 Changement charnière droite why! L140/1PU, Cadre sup. 2: crwdns2935265:04crwdnd2935265:02crwdnd2935265:03crwdne2935265:0 Changement charnière droite why! L140/1PU, Cadre sup. 2: crwdns2935265:04crwdnd2935265:03crwdnd2935265:03crwdne2935265:0
    • Dévisser la vis du cache, ainsi que les celles de la charnière. Enlever le cache.

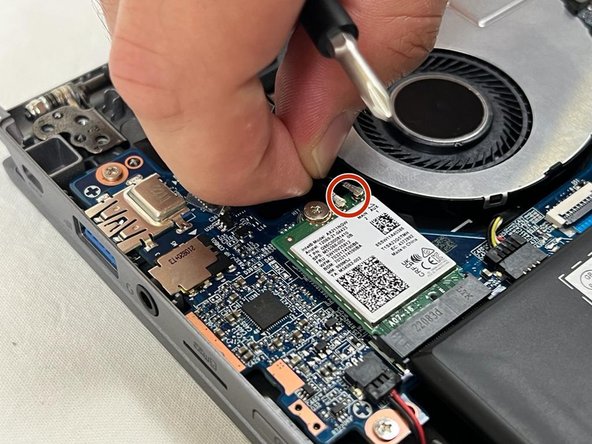
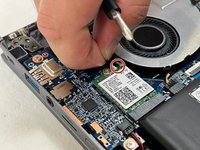
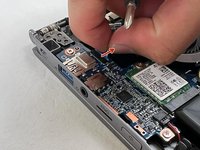
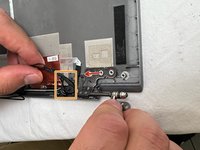
    • Débrancher les câbles du Wifi.

  5. Changement charnière droite why! L140/1PU, Cadre sup. 3: crwdns2935265:05crwdnd2935265:01crwdnd2935265:03crwdne2935265:0 Changement charnière droite why! L140/1PU, Cadre sup. 3: crwdns2935265:05crwdnd2935265:02crwdnd2935265:03crwdne2935265:0 Changement charnière droite why! L140/1PU, Cadre sup. 3: crwdns2935265:05crwdnd2935265:03crwdnd2935265:03crwdne2935265:0
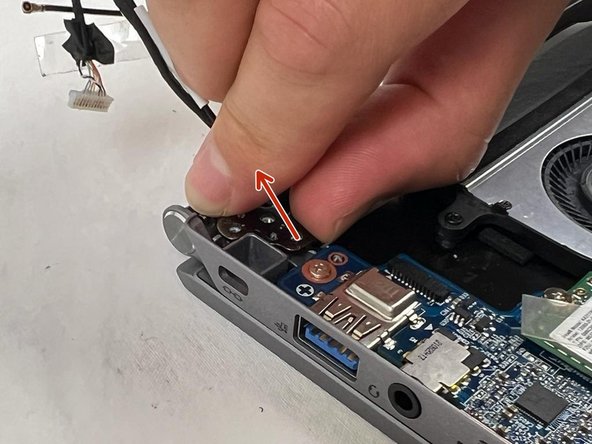
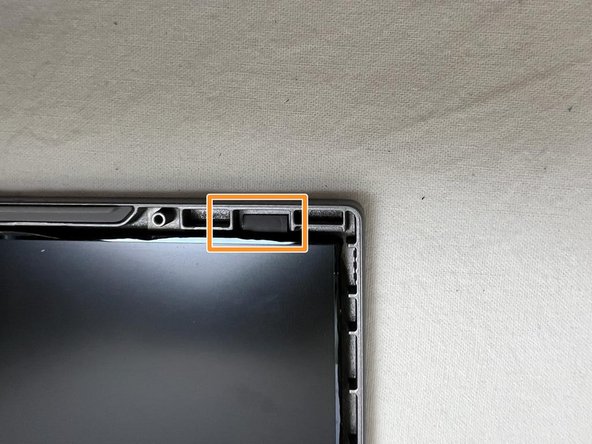
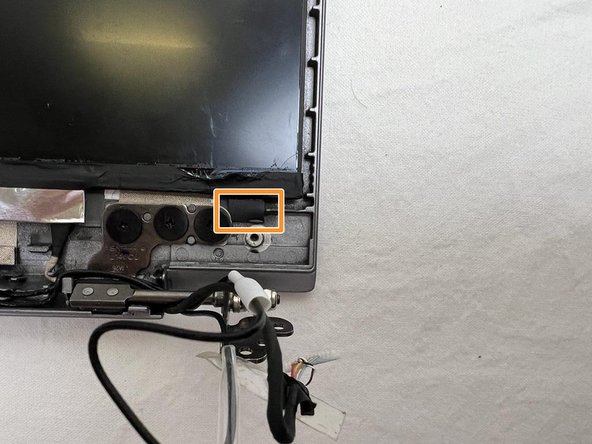
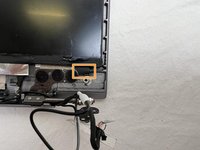
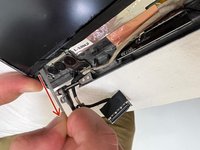
    • Débrancher le câble de la caméra.

    • Ouvrir les deux charnières.

  6. Changement charnière droite why! L140/1PU, Cadre sup. 4: crwdns2935265:06crwdnd2935265:01crwdnd2935265:03crwdne2935265:0 Changement charnière droite why! L140/1PU, Cadre sup. 4: crwdns2935265:06crwdnd2935265:02crwdnd2935265:03crwdne2935265:0 Changement charnière droite why! L140/1PU, Cadre sup. 4: crwdns2935265:06crwdnd2935265:03crwdnd2935265:03crwdne2935265:0
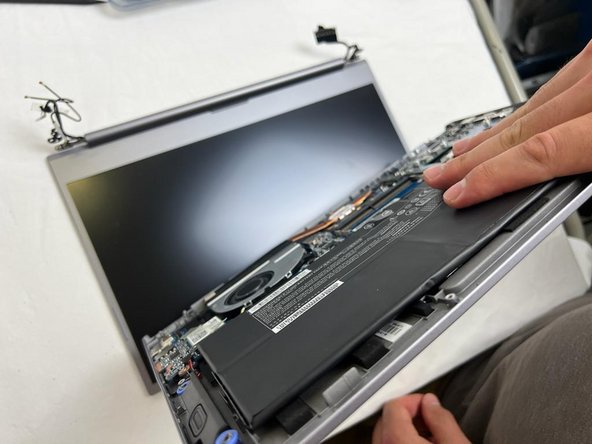
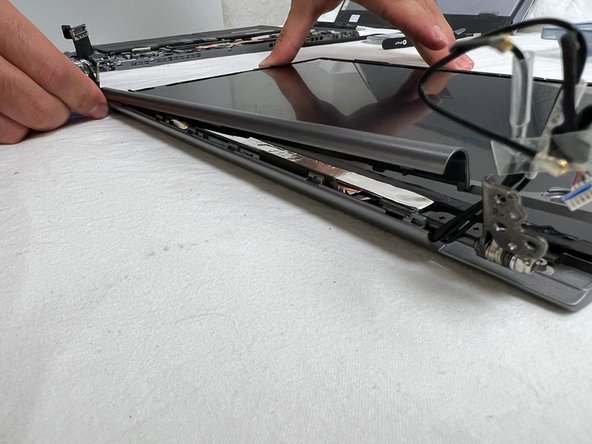
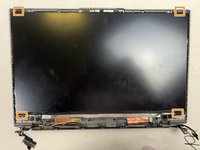
    • Retirer le boîtier supérieur de manière à le séparer de l'écran.

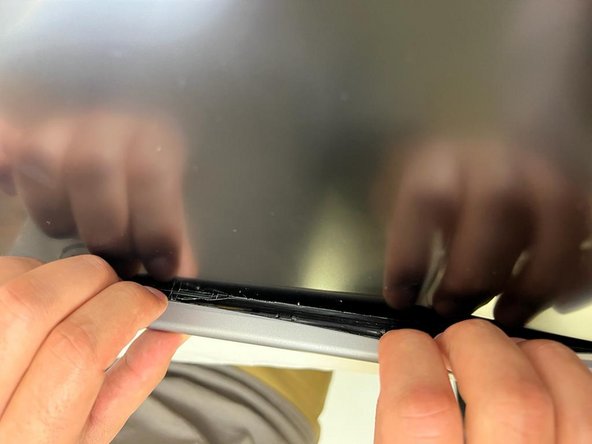
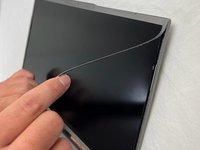
    • À l'aide d'un sèche cheveu, tourner autour de l'écran pour adoucir l'adhésif du cadre.

    • Ne jamais rester sur le même endroit afin d'éviter d'endommager les composants.

  7. Changement charnière droite why! L140/1PU, Cadre sup. 5: crwdns2935265:07crwdnd2935265:01crwdnd2935265:03crwdne2935265:0 Changement charnière droite why! L140/1PU, Cadre sup. 5: crwdns2935265:07crwdnd2935265:02crwdnd2935265:03crwdne2935265:0 Changement charnière droite why! L140/1PU, Cadre sup. 5: crwdns2935265:07crwdnd2935265:03crwdnd2935265:03crwdne2935265:0
    • Décoller le cadre.

    • Le plectre iFixit peut être utilisé, mais les ongles font aussi l'affaire.

  8. Changement charnière droite why! L140/1PU: crwdns2935265:08crwdnd2935265:01crwdnd2935265:02crwdne2935265:0 Changement charnière droite why! L140/1PU: crwdns2935265:08crwdnd2935265:02crwdnd2935265:02crwdne2935265:0
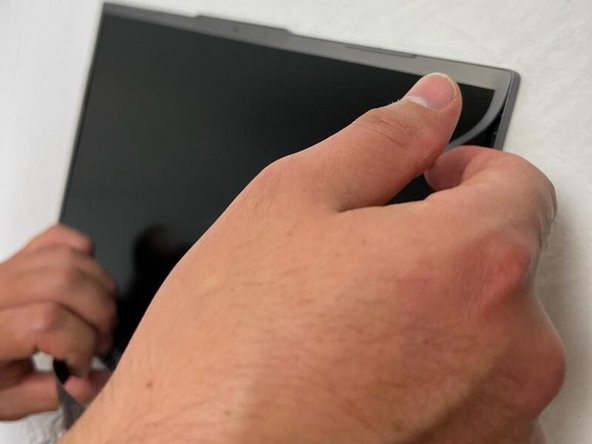
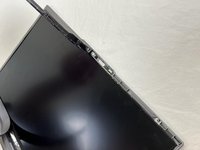
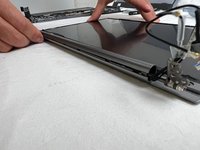
    • Enlever le cadre supérieur de l'écran.

  9. Changement charnière droite why! L140/1PU, Cadre inf. 1: crwdns2935265:09crwdnd2935265:01crwdnd2935265:02crwdne2935265:0 Changement charnière droite why! L140/1PU, Cadre inf. 1: crwdns2935265:09crwdnd2935265:02crwdnd2935265:02crwdne2935265:0
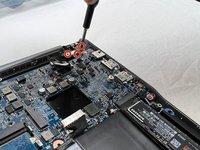
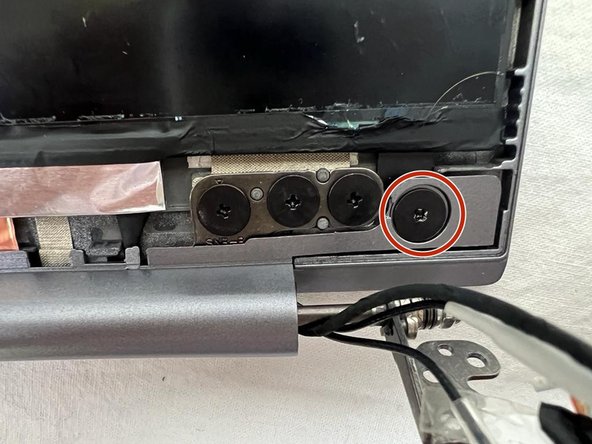
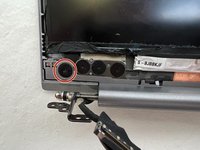
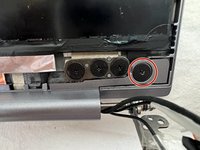
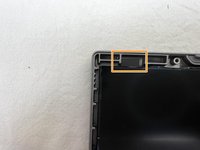
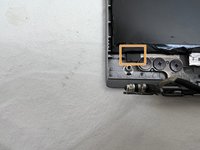
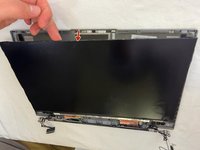
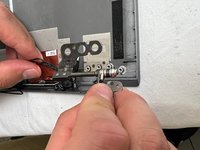
    • Dévisser les deux vis encerclé en rouge.

  10. Changement charnière droite why! L140/1PU, Cadre inf. 2: crwdns2935265:010crwdnd2935265:01crwdnd2935265:03crwdne2935265:0 Changement charnière droite why! L140/1PU, Cadre inf. 2: crwdns2935265:010crwdnd2935265:02crwdnd2935265:03crwdne2935265:0 Changement charnière droite why! L140/1PU, Cadre inf. 2: crwdns2935265:010crwdnd2935265:03crwdnd2935265:03crwdne2935265:0
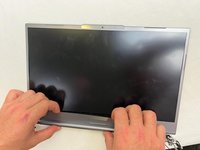
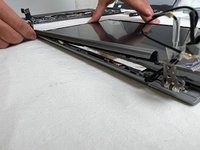
    • Détacher le cadre inférieur de l'écran.

  11. Changement charnière droite why! L140/1PU, Screen 1: crwdns2935265:011crwdnd2935265:01crwdnd2935265:03crwdne2935265:0 Changement charnière droite why! L140/1PU, Screen 1: crwdns2935265:011crwdnd2935265:02crwdnd2935265:03crwdne2935265:0 Changement charnière droite why! L140/1PU, Screen 1: crwdns2935265:011crwdnd2935265:03crwdnd2935265:03crwdne2935265:0
    • Il faut enlever les 4 rubans adhésifs.

  12. Changement charnière droite why! L140/1PU, Screen 2: crwdns2935265:012crwdnd2935265:01crwdnd2935265:03crwdne2935265:0 Changement charnière droite why! L140/1PU, Screen 2: crwdns2935265:012crwdnd2935265:02crwdnd2935265:03crwdne2935265:0 Changement charnière droite why! L140/1PU, Screen 2: crwdns2935265:012crwdnd2935265:03crwdnd2935265:03crwdne2935265:0
    • À l'aide de la pince à brucelles, saisir et gentiment tirer sur la bande adhésive.

  13. Changement charnière droite why! L140/1PU, Screen 3: crwdns2935265:013crwdnd2935265:01crwdnd2935265:03crwdne2935265:0 Changement charnière droite why! L140/1PU, Screen 3: crwdns2935265:013crwdnd2935265:02crwdnd2935265:03crwdne2935265:0 Changement charnière droite why! L140/1PU, Screen 3: crwdns2935265:013crwdnd2935265:03crwdnd2935265:03crwdne2935265:0
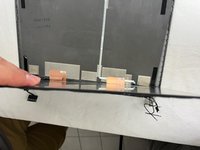
    • Tirer le ruban jusqu'à ce qu'il s'enlève. Répéter sur les 3 autres côtés.

    • Soulever l'écran.

  14. Changement charnière droite why! L140/1PU, Screen 4: crwdns2935265:014crwdnd2935265:01crwdnd2935265:03crwdne2935265:0 Changement charnière droite why! L140/1PU, Screen 4: crwdns2935265:014crwdnd2935265:02crwdnd2935265:03crwdne2935265:0 Changement charnière droite why! L140/1PU, Screen 4: crwdns2935265:014crwdnd2935265:03crwdnd2935265:03crwdne2935265:0
    • Enlever le scotch.

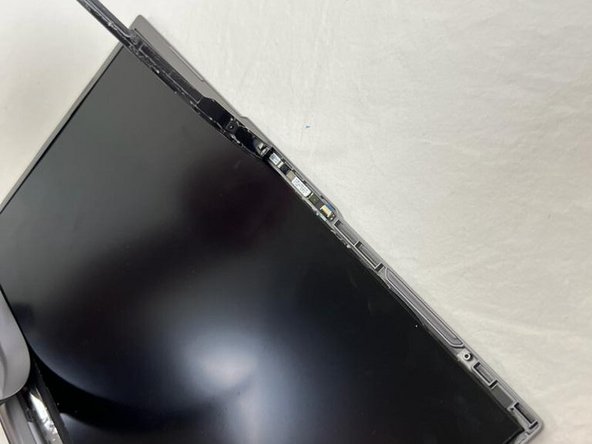
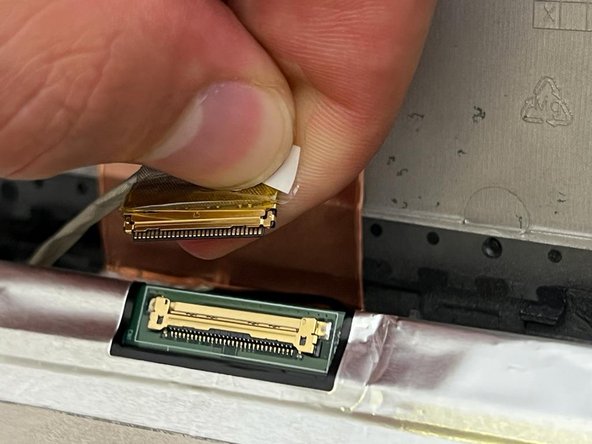
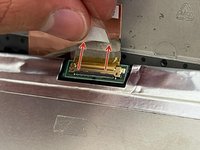
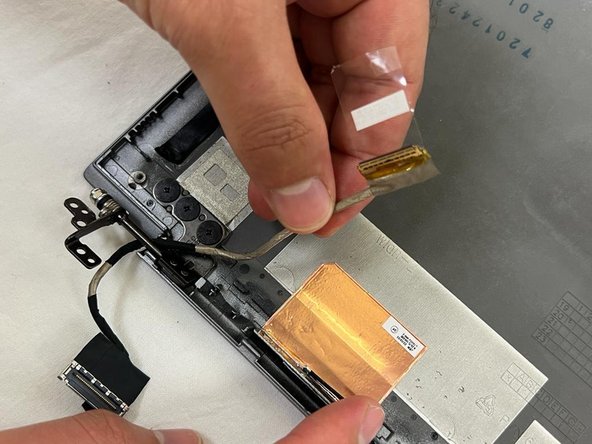
    • Retirer le câble de l'écran.
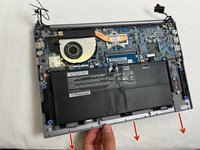
  15. Changement charnière droite why! L140/1PU, EDP: crwdns2935265:015crwdnd2935265:01crwdnd2935265:02crwdne2935265:0 Changement charnière droite why! L140/1PU, EDP: crwdns2935265:015crwdnd2935265:02crwdnd2935265:02crwdne2935265:0
    • Libérer le câble et le retirer.

  16. Changement charnière droite why! L140/1PU, Ch. D: crwdns2935265:016crwdnd2935265:01crwdnd2935265:03crwdne2935265:0 Changement charnière droite why! L140/1PU, Ch. D: crwdns2935265:016crwdnd2935265:02crwdnd2935265:03crwdne2935265:0 Changement charnière droite why! L140/1PU, Ch. D: crwdns2935265:016crwdnd2935265:03crwdnd2935265:03crwdne2935265:0
    • Dévisser les 3 vis.

    • Dégager les câbles.

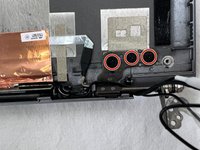
    • Retirer la charnière.

crwdns2915888:0crwdne2915888:0

Pour réassembler votre appareil, suivez les instructions dans l'ordre inverse.

Felice Suglia

crwdns2935283:006/15/13crwdne2935283:0

33.312 crwdns2915208:0crwdne2915208:0

crwdns2935297:0282crwdne2935297:0

crwdns2947412:00crwdne2947412:0

crwdns2917038:0crwdne2917038:0

crwdns2936625:0crwdne2936625:0:

crwdns2936751:024crwdne2936751:0 0

crwdns2936753:07crwdne2936753:0 2

crwdns2936753:030crwdne2936753:0 3

crwdns2942667:0crwdne2942667:0 52