crwdns2933423:0crwdne2933423:0

Motorola Moto G5 の解体手順

crwdns2931529:0crwdnd2931529:0crwdnd2931529:0crwdnd2931529:02crwdnd2931529:0crwdne2931529:0

crwdns2936315:0crwdne2936315:0
crwdns2936323:0crwdne2936323:0
crwdns2931653:03crwdne2931653:0
Motorola Moto G5 Plus Disassembly: crwdns2935265:00crwdnd2935265:01crwdnd2935265:03crwdne2935265:0 Motorola Moto G5 Plus Disassembly: crwdns2935265:00crwdnd2935265:02crwdnd2935265:03crwdne2935265:0 Motorola Moto G5 Plus Disassembly: crwdns2935265:00crwdnd2935265:03crwdnd2935265:03crwdne2935265:0
  • The screen is likely to crack as you pry it up. You should not complete this step unless you have a replacement screen available.

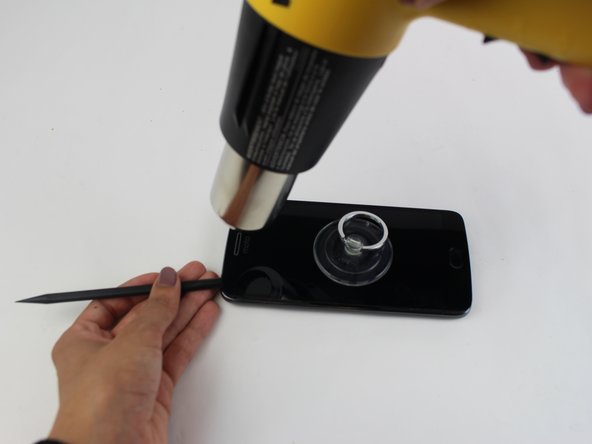
  • Stick the small suction cup onto the screen. Use this to remove the screen from the phone frame in later steps.

  • Using a heat gun on a low setting, slowly raise the temperature of the screen by repeatedly running the heat gun along the edges of the screen. This will soften the glue that holds the screen to the phone frame.

  • Use the suction cup to gently pull up on the screen while using the plastic opening tool to gently pry the edges of the screen up.

  • Once the screen has been completely separated from the phone frame, flip it to one side to expose the inside of the phone.

スクリーンをこじ開ける際に、割れてしまう可能性があります。 利用可能な交換用のスクリーンを必ず準備して、この作業を始めてください。

小型の吸盤カップをスクリーン上に取り付けます。最後の手順にあるデバイスのフレームからスクリーンを外すには、この吸盤カップを使用してください。

低温設定したヒートガンを使って、ゆっくりとスクリーンに当てる温度を上昇させながら、スクリーンの端に沿って、ヒートガンを左右に動かします。

吸盤カップを使って、スクリーンをゆっくりと引き上げます。その間、プラスチックの開口ツールを使って慎重にスクリーンのエッジをこじ開けます。

スクリーンが完全にフレームから外れたら、これを裏返してデバイス内側向きのスクリーンを上にします。

crwdns2944171:0crwdnd2944171:0crwdnd2944171:0crwdnd2944171:0crwdne2944171:0