crwdns2931529:0crwdnd2931529:0crwdnd2931529:0crwdnd2931529:013crwdnd2931529:0crwdne2931529:0
crwdns2935425:04crwdne2935425:0
crwdns2931653:04crwdne2931653:0


Remove the heat sink
-
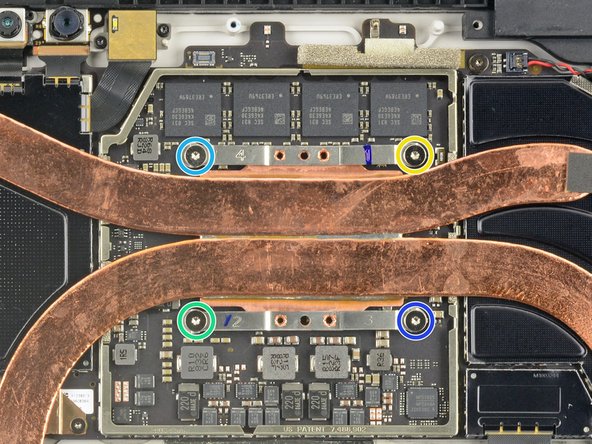
Remove the nine Torx screws securing the heat sink:
-
Five 2.6 mm-long T3 screws
-
Four 3.3 mm-long T5 screws
-
Screw 1
-
Screw 2
-
Screw 3
-
Screw 4
| [title] Remove the heat sink | |
| - | [* black] Remove the |
| + | [* black] Remove the nine Torx screws securing the heat sink: |
| [* red] Five 2.6 mm-long T3 screws | |
| [* orange] Four 3.3 mm-long T5 screws | |
| [* icon_reminder] During reassembly, tighten the heat sink screws in the following criss-cross pattern, one turn at a time, until they're tight: | |
| [* yellow] Screw 1 | |
| [* green] Screw 2 | |
| [* light_blue] Screw 3 | |
| [* blue] Screw 4 |
crwdns2944171:0crwdnd2944171:0crwdnd2944171:0crwdnd2944171:0crwdne2944171:0