crwdns2933423:0crwdne2933423:0

Sostituzione Batteria iPod Touch 4a Generazione

crwdns2936315:0crwdne2936315:0
crwdns2936321:0crwdne2936321:0
crwdns2931653:08crwdne2931653:0
iPod Touch 4th Generation Battery Replacement: crwdns2935265:00crwdnd2935265:01crwdnd2935265:03crwdne2935265:0 iPod Touch 4th Generation Battery Replacement: crwdns2935265:00crwdnd2935265:02crwdnd2935265:03crwdne2935265:0 iPod Touch 4th Generation Battery Replacement: crwdns2935265:00crwdnd2935265:03crwdnd2935265:03crwdne2935265:0
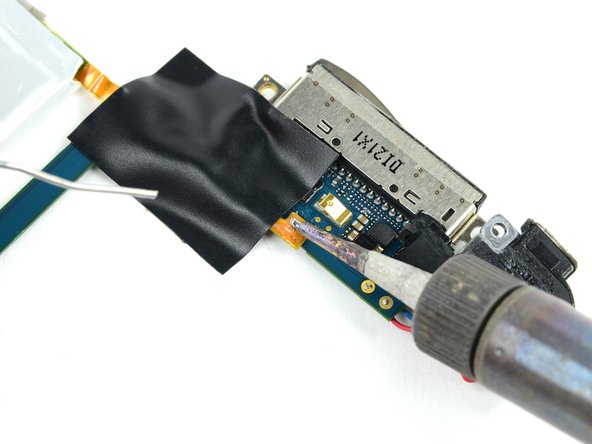
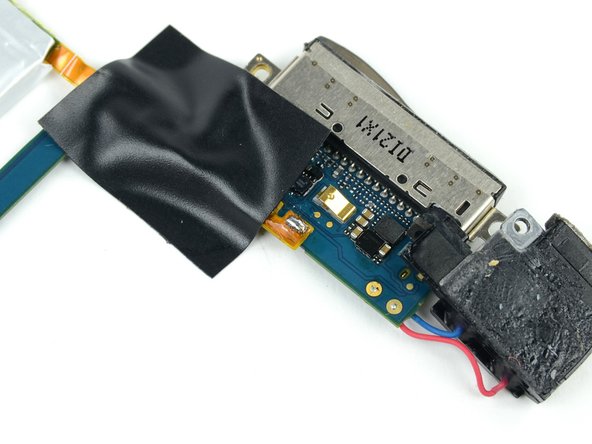
  • Place the new battery in place and align the far contact with the outer solder pad. Use a small strip of electrical tape to hold the cable against the solder pads.

  • Installing the battery upside down (with the cable facing up) will destroy the logic board.

  • Place the strip of tape over the end of the battery ribbon cable to cover two of the solder pads and hold the contacts down against the logic board.

  • Heat the rightmost contact until the solder below melts, then apply a small amount of solder to the contact, allowing it to flow through the two holes in the cable and down to the logic board.

  • Do not apply too much solder. The amount required for a proper bond is miniscule.

  • As soon as the solder has flowed into the joint, remove both the solder and the iron.

Appoggia la nuova batteria in posizione e allinea il foro più lontano con il contatto più lontano. Usa un pezzo di nastro isolante per tenere il cavo contro i contatti.

Installare la batteria al contrario (con il cavo rivolto verso l'alto) distruggerà la scheda madre.

Appoggia la striscia di nastro adesivo sull'estremità del cavo a nastro della batteria per coprire gli altri due contatti e tenere i contatti contro la scheda madre.

Scalda il contatto più a destra fino a sciogliere la saldatura, quindi applicane ancora una piccola quantità sul contatto, lasciandola scorrere attraverso i due fori sul cavo e verso la scheda madre.

Non applicare troppa saldatura. La quantità richiesta per una buona presa è molto poca.

Non appena la saldatura è arrivata sul contatto, rimuovi sia la saldatura che il saldatore.

crwdns2944171:0crwdnd2944171:0crwdnd2944171:0crwdnd2944171:0crwdne2944171:0