crwdns2933423:0crwdne2933423:0

Remplacement de la batterie de l'iPod Touch 4ème génération

crwdns2936315:0crwdne2936315:0
crwdns2936317:0crwdne2936317:0
crwdns2931653:08crwdne2931653:0
iPod Touch 4th Generation Battery Replacement: crwdns2935265:00crwdnd2935265:01crwdnd2935265:03crwdne2935265:0 iPod Touch 4th Generation Battery Replacement: crwdns2935265:00crwdnd2935265:02crwdnd2935265:03crwdne2935265:0 iPod Touch 4th Generation Battery Replacement: crwdns2935265:00crwdnd2935265:03crwdnd2935265:03crwdne2935265:0
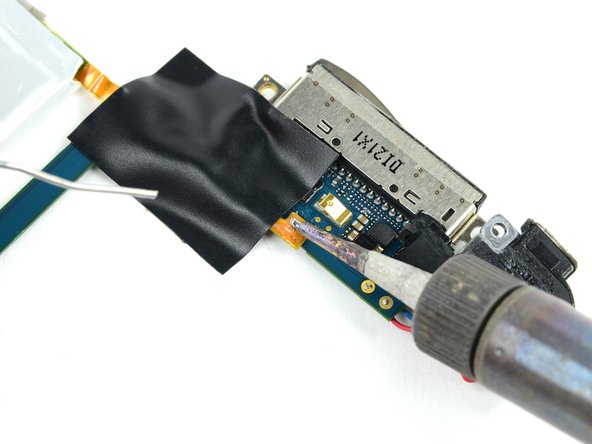
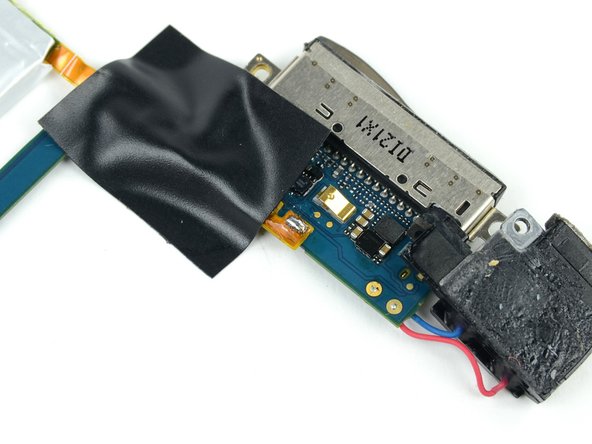
  • Place the new battery in place and align the far contact with the outer solder pad. Use a small strip of electrical tape to hold the cable against the solder pads.

  • Installing the battery upside down (with the cable facing up) will destroy the logic board.

  • Place the strip of tape over the end of the battery ribbon cable to cover two of the solder pads and hold the contacts down against the logic board.

  • Heat the rightmost contact until the solder below melts, then apply a small amount of solder to the contact, allowing it to flow through the two holes in the cable and down to the logic board.

  • Do not apply too much solder. The amount required for a proper bond is miniscule.

  • As soon as the solder has flowed into the joint, remove both the solder and the iron.

Posez la nouvelle batterie à sa place et alignez le contact éloigné avec le point de soudure extérieur. Utilisez un petit morceau de ruban adhésif isolant pour maintenir la nappe contre les points de soudure.

Poser la batterie à l'envers (avec la nappe vers le haut) détruirait la carte mère.

Placez le morceau de ruban isolant sur l'extrémité de la nappe de la batterie pour couvrir deux des points de soudure et maintenir les contacts contre la carte mère.

Chauffez le contact le plus à droite jusqu'à ce que la soudure en dessous fonde, puis appliquez une petite quantité de soudure sur le contact, laissez-lui le temps de circuler à travers les deux trous de la nappe et jusqu'à la carte mère.

N'appliquez pas trop de soudure. La quantité requise pour une bonne tenue est minime.

Dès que la soudure a coulé dans le joint, retirez à la fois la soudure et la panne.

crwdns2944171:0crwdnd2944171:0crwdnd2944171:0crwdnd2944171:0crwdne2944171:0