crwdns2933423:0crwdne2933423:0

Asus Zen AiO Pro Z240IC Screen Replacement

crwdns2931529:0crwdnd2931529:0crwdnd2931529:0crwdnd2931529:08crwdnd2931529:0crwdne2931529:0

crwdns2936315:0crwdne2936315:0
crwdns2936321:0crwdne2936321:0
crwdns2931653:03crwdne2931653:0
Asus Zen AiO Pro Z240IC Screen Replacement: crwdns2935265:00crwdnd2935265:01crwdnd2935265:03crwdne2935265:0 Asus Zen AiO Pro Z240IC Screen Replacement: crwdns2935265:00crwdnd2935265:02crwdnd2935265:03crwdne2935265:0 Asus Zen AiO Pro Z240IC Screen Replacement: crwdns2935265:00crwdnd2935265:03crwdnd2935265:03crwdne2935265:0
  • Place the computer on its back, facing up.

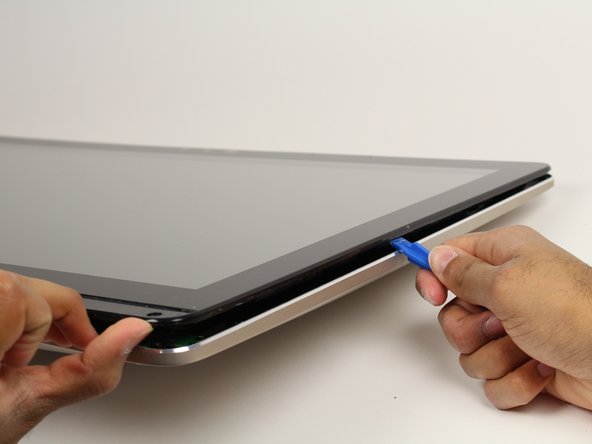
  • Wedge the plastic opening tool in between the screen and the bezel of the aluminum computer casing.

  • Move the tool along the entire edge of the screen with an up-and-down prying motion to loosen the screen from the casing. Do not lift the entire screen away from the computer yet.

  • The screen is held in place by plastic tabs. These will create a popping sound when loosened.

  • The screen assembly will flex as it is pried off. Do not bend the screen too far or the glass screen could shatter.

crwdns2935429:0crwdne2935429:0

crwdns2935429:0crwdne2935429:0

crwdns2935429:0crwdne2935429:0

crwdns2935429:0crwdne2935429:0

crwdns2935429:0crwdne2935429:0

crwdns2944171:0crwdnd2944171:0crwdnd2944171:0crwdnd2944171:0crwdne2944171:0