crwdns2933423:0crwdne2933423:0

Démontage du Intel NUC5i7RYH

crwdns2936315:0crwdne2936315:0
crwdns2936317:0crwdne2936317:0
crwdns2931653:02crwdne2931653:0
Intel NUC5i7RYH Disassembly, Lid and HDD Bracket: crwdns2935265:00crwdnd2935265:01crwdnd2935265:03crwdne2935265:0 Intel NUC5i7RYH Disassembly, Lid and HDD Bracket: crwdns2935265:00crwdnd2935265:02crwdnd2935265:03crwdne2935265:0 Intel NUC5i7RYH Disassembly, Lid and HDD Bracket: crwdns2935265:00crwdnd2935265:03crwdnd2935265:03crwdne2935265:0
Lid and HDD Bracket
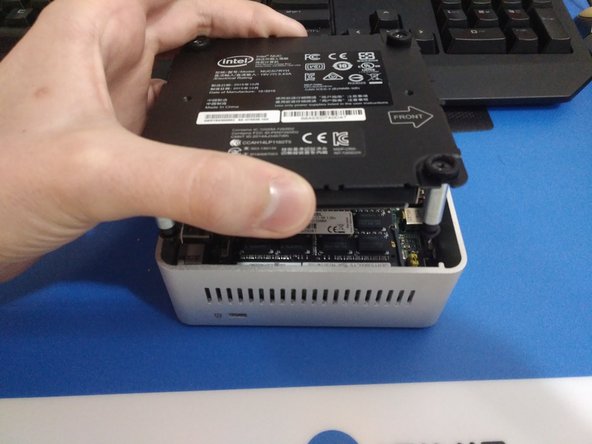
  • Lift the door, and keep an eye on the cables that connect to the NUC's motherboard. These cables are the power and data cables for the 2.5" hard drive bay.

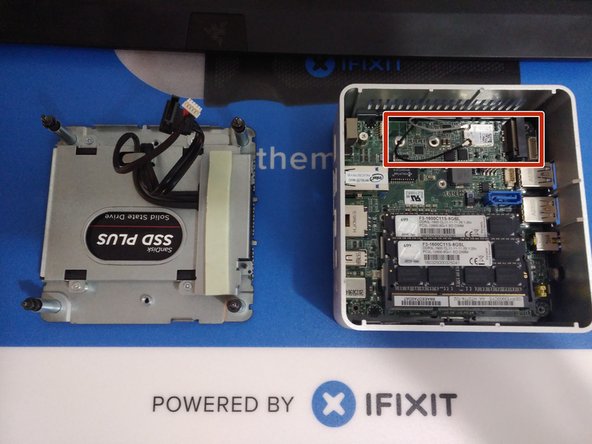
  • Carefully unplug the cables from the motherboard, and set the bracket aside.

  • In the last photo, the slot for a blade SSD is marked. This is where you would install the blade SSD, and use a screw to hold it in place.

Soulevez la porte et surveillez les câbles qui se connectent à la carte mère du NUC. Ces câbles sont les câbles d'alimentation et de données pour la baie de disque dur 2,5".

Débranchez soigneusement les câbles de la carte mère et mettez le support de côté.

Sur la dernière photo, l'emplacement pour un SSD lame est marqué. C'est là que vous installeriez le SSD lame et utiliseriez une vis pour le maintenir en place.

crwdns2944171:0crwdnd2944171:0crwdnd2944171:0crwdnd2944171:0crwdne2944171:0