crwdns2933423:0crwdne2933423:0

iPhone 8の分解

crwdns2936315:0crwdne2936315:0
crwdns2936323:0crwdne2936323:0
crwdns2931653:04crwdne2931653:0
iPhone 8 Teardown: crwdns2935265:00crwdnd2935265:01crwdnd2935265:03crwdne2935265:0 iPhone 8 Teardown: crwdns2935265:00crwdnd2935265:02crwdnd2935265:03crwdne2935265:0 iPhone 8 Teardown: crwdns2935265:00crwdnd2935265:03crwdnd2935265:03crwdne2935265:0
  • Time to get this teardown underway. After twirling away the pentalobe screws, we need some heat as an antidote to the waterproof display seals.

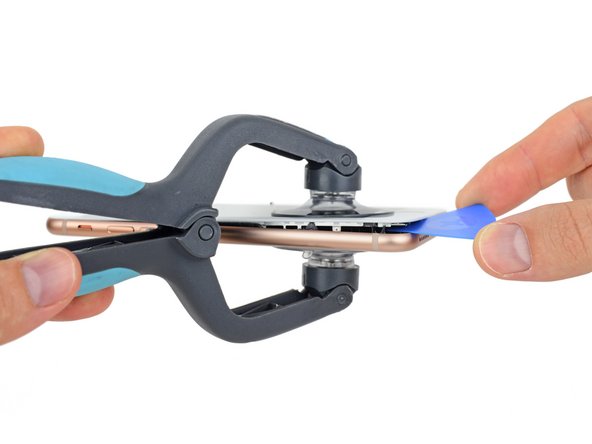
  • iOpener—bam! Seals softened. Next we pull the iSclack out of our tool bag for some pulling power, and slice through the adhesive with a little help from our friends opening picks.

  • Do you ever have déjà vu?

  • ... and we're in! A first glance reveals nothing new—yet. But we've only just scratched the glassy surface.

この分解を進める時間がやってきました。星型ペンタローブネジを外した後、耐水性ディスプレイシール(圧着剤)を溶かすために熱を当てます。

ここでiOpenerの登場です!圧着剤が柔らかくなりました。次にツールバッグからiSclackを取り出して、スクリーンを上下に引き離します。生じた隙間に開口ピックを差し込むとより効果的です。

一体これはデジャブでしょうか?

…さて内部が開きました!最初に確認できるのは目新しいものがないということですー今の所。でもまだガラスの表面をスクラッチしただけなので先に進みましょう。

crwdns2944171:0crwdnd2944171:0crwdnd2944171:0crwdnd2944171:0crwdne2944171:0