crwdns2933423:0crwdne2933423:0

Remplacement de l'écran LCD du Sanyo VPC-T700

crwdns2936315:0crwdne2936315:0
crwdns2936317:0crwdne2936317:0
crwdns2931653:04crwdne2931653:0
Sanyo VPC-T700 LCD Screen Replacement: crwdns2935265:00crwdnd2935265:01crwdnd2935265:03crwdne2935265:0 Sanyo VPC-T700 LCD Screen Replacement: crwdns2935265:00crwdnd2935265:02crwdnd2935265:03crwdne2935265:0 Sanyo VPC-T700 LCD Screen Replacement: crwdns2935265:00crwdnd2935265:03crwdnd2935265:03crwdne2935265:0
  • The rear cover can now be easily removed. The LCD is sitting in a frame without fasteners. It will just lift up, however, there will be a piece of insulating material that is separating the back of the LCD from the logic board. Remove this after the removal of the LCD from the frame. Do not try to remove the LCD from the PCB yet.

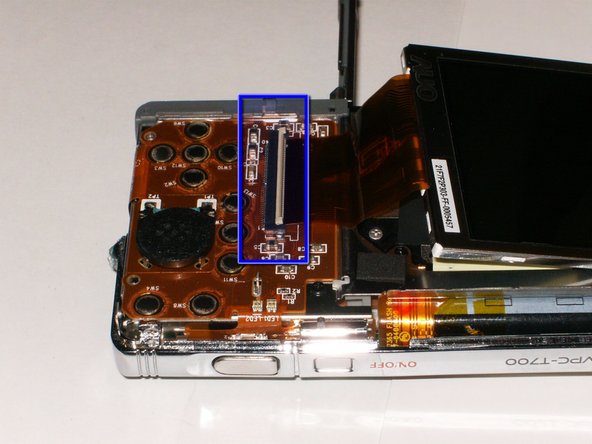
  • Open the ribbon cable connector by pulling the white clasp gently up.
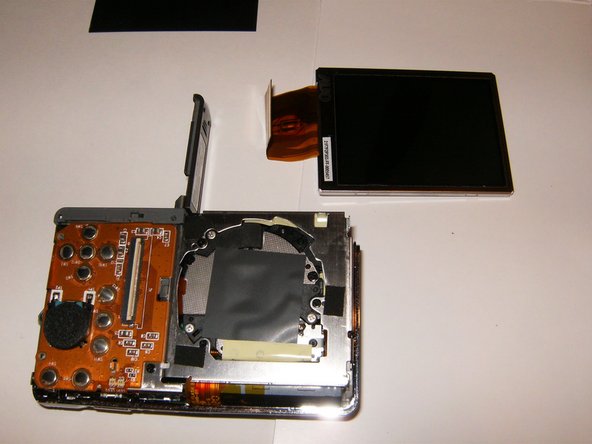
  • Remove the old LCD.

Le capot arrière peut maintenant être facilement retiré. L'écran LCD est assis dans un cadre sans attaches. Il se soulèvera simplement, cependant, il y aura un morceau de matériau isolant qui sépare l'arrière de l'écran LCD de la carte mère. Retirez-le après avoir retiré l'écran LCD du cadre. N'essayez pas encore de retirer l'écran LCD du PCB.

Ouvrez le connecteur du câble ruban en tirant doucement sur le fermoir blanc.

Retirez l'ancien écran LCD.

crwdns2944171:0crwdnd2944171:0crwdnd2944171:0crwdnd2944171:0crwdne2944171:0