crwdns2933423:0crwdne2933423:0

why! N240JU Replacing the LCD screen

crwdns2931531:0crwdnd2931531:0crwdnd2931531:0crwdnd2931531:0crwdne2931531:0

crwdns2936317:0crwdne2936317:0
crwdns2936315:0crwdne2936315:0
crwdns2931653:02crwdne2931653:0
why! N240JU Remplacement de l'écran LCD: crwdns2935265:00crwdnd2935265:01crwdnd2935265:03crwdne2935265:0 why! N240JU Remplacement de l'écran LCD: crwdns2935265:00crwdnd2935265:02crwdnd2935265:03crwdne2935265:0 why! N240JU Remplacement de l'écran LCD: crwdns2935265:00crwdnd2935265:03crwdnd2935265:03crwdne2935265:0
  • Décollez la bande adhésive du second connecteur.

  • Puis déconnectez le second connecteur.

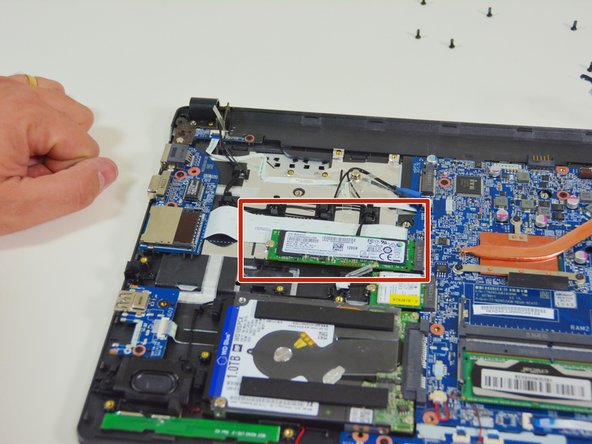
  • Repérez ensuite le disque SSD M.2.

Peel off the tape from the second connector.

Then disconnect the second connector.

Locate the SSD M.2 drive.

crwdns2944171:0crwdnd2944171:0crwdnd2944171:0crwdnd2944171:0crwdne2944171:0