crwdns2933423:0crwdne2933423:0

Changement dissipateur thermique iMac Intel 21,5" écran Retina 4K (2017)

crwdns2931529:0crwdnd2931529:0crwdnd2931529:0crwdnd2931529:02crwdnd2931529:0crwdne2931529:0

crwdns2935425:01crwdne2935425:0

crwdns2936315:0crwdne2936315:0
crwdns2936317:0crwdne2936317:0
crwdns2931653:01crwdne2931653:0
iMac Intel 21.5" Retina 4K Display (2017) Heat Sink Replacement: crwdns2935265:00crwdnd2935265:01crwdnd2935265:02crwdne2935265:0 iMac Intel 21.5" Retina 4K Display (2017) Heat Sink Replacement: crwdns2935265:00crwdnd2935265:02crwdnd2935265:02crwdne2935265:0
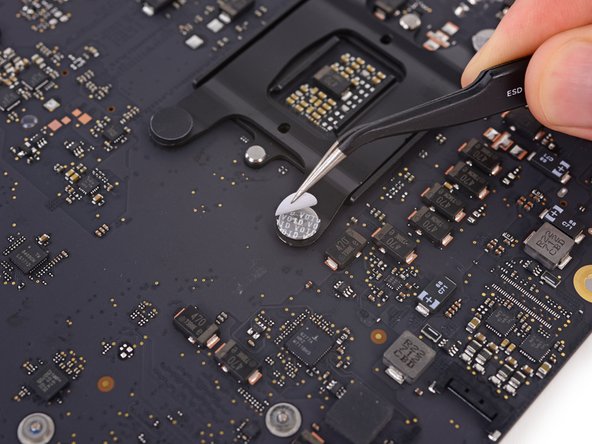
  • Peel off the four black tamper-evident stickers covering the heat sink mounting screws.

  • Remove the four T10 screws that secure the heat sink from the backside of the logic board.

  • During reassembly, tighten these screws one full turn at a time, alternating in a cross pattern. This will gradually increase the clamping pressure evenly across the surface of the CPU. Continue gradually tightening the screws until they're snug and the entire spring plate lays flat against the logic board.

Décollez les quatre autocollants noirs d'inviolabilité recouvrant les vis de montage du dissipateur thermique.

Retirez les quatre vis T10 qui fixent le dissipateur thermique à l'arrière de la carte mère.

Lors du remontage, serrez ces vis d'un tour complet à la fois, en alternant selon un schéma en croix. Cela permettra d'augmenter progressivement la pression de serrage de manière uniforme sur toute la surface du processeur. Continuez à serrer progressivement les vis jusqu'à ce qu'elles soient bien ajustées et que l'ensemble de la plaque de ressort soit à plat contre la carte mère.

crwdns2944171:0crwdnd2944171:0crwdnd2944171:0crwdnd2944171:0crwdne2944171:0