crwdns2933423:0crwdne2933423:0

MacBook Pro 15" Retina Display Late 2013 배터리 교체

crwdns2931529:0crwdnd2931529:0crwdnd2931529:0crwdnd2931529:02crwdnd2931529:0crwdne2931529:0

crwdns2936315:0crwdne2936315:0
crwdns2936325:0crwdne2936325:0
crwdns2931653:011crwdne2931653:0
MacBook Pro 15" Retina Display Late 2013 Battery Replacement: crwdns2935265:00crwdnd2935265:01crwdnd2935265:03crwdne2935265:0 MacBook Pro 15" Retina Display Late 2013 Battery Replacement: crwdns2935265:00crwdnd2935265:02crwdnd2935265:03crwdne2935265:0 MacBook Pro 15" Retina Display Late 2013 Battery Replacement: crwdns2935265:00crwdnd2935265:03crwdnd2935265:03crwdne2935265:0
  • It's time to switch sides. Remove your book or foam block and place it under the opposite side of your MacBook Pro.

  • Repeat the procedure from the prior steps to separate the two battery cells on this side:

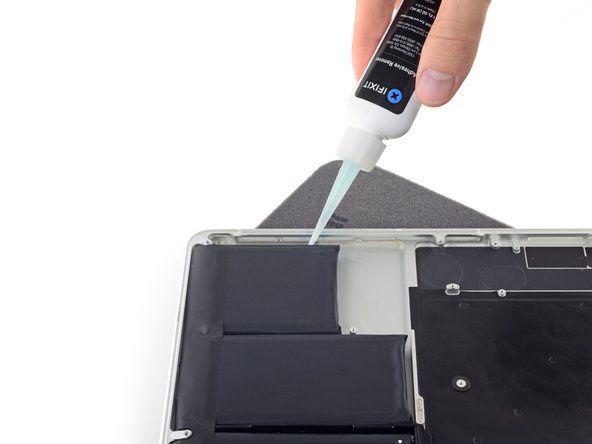
  • Apply your adhesive remover to the elevated edge of the outer battery cell, and wait 2-3 minutes for it to penetrate.

  • Work one corner of a plastic card underneath the battery cell, and slide the card fully underneath the battery cell to separate it.

  • Do the same for the adjacent cell.

  • Leave your plastic card in place or flip the battery cells over to prevent them from re-adhering during the following steps.

이제 반대편을 작업할 때입니다. 책이나 폼 블록을 옮겨서 MacBook Pro의 반대쪽 밑에 놓습니다.

이전 단계의 절차를 반복하여 이쪽의 두 배터리 셀을 분리하세요:

왼쪽 바깥쪽 배터리 셀의 돌출된 가장자리에 접착 제거제를 바르고 접착제가 스며들 때까지 2~3분간 기다리세요.

플라스틱 카드의 한쪽 모서리를 배터리 셀 아래에 끼우고 카드를 배터리 셀 밑으로 완전히 밀어 넣어 분리하세요.

옆 셀에도 똑같이 작업하세요.

다음 단계에서 플라스틱 카드가 다시 붙지 않도록 플라스틱 카드를 제자리에 두거나 배터리 셀을 뒤집어 놓으세요.

crwdns2944171:0crwdnd2944171:0crwdnd2944171:0crwdnd2944171:0crwdne2944171:0