crwdns2933423:0crwdne2933423:0

Imprimante photo Dell 540 Retrait du panneau de configuration Remplacement de la carte mère

crwdns2931529:0crwdnd2931529:0crwdnd2931529:0crwdnd2931529:02crwdnd2931529:0crwdne2931529:0

crwdns2936315:0crwdne2936315:0
crwdns2936317:0crwdne2936317:0
crwdns2931653:02crwdne2931653:0
Dell Photo Printer 540 Removal of the Control Panel Motherboard Replacement: crwdns2935265:00crwdnd2935265:01crwdnd2935265:02crwdne2935265:0 Dell Photo Printer 540 Removal of the Control Panel Motherboard Replacement: crwdns2935265:00crwdnd2935265:02crwdnd2935265:02crwdne2935265:0
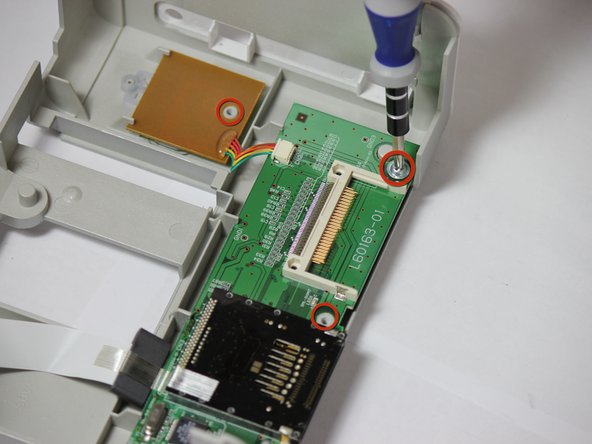
  • Locate the four 7.85 mm screws attaching the control panel motherboard to the top face casing.

  • Use a Phillips Head #1 screw driver to remove the four highlighted screws.

  • NOTE: Make sure removal of front face plate is completed.

Repérez les quatre vis de 7,85 mm fixant la carte mère du panneau de commande au boîtier de la face supérieure.

Utilisez un tournevis cruciforme n° 1 pour retirer les quatre vis en surbrillance.

REMARQUE : Assurez-vous que le retrait de la plaque frontale est terminé.

crwdns2944171:0crwdnd2944171:0crwdnd2944171:0crwdnd2944171:0crwdne2944171:0