crwdns2933423:0crwdne2933423:0

Remplacement de la carte mère de l'imprimante photo Dell 540

crwdns2931529:0crwdnd2931529:0crwdnd2931529:0crwdnd2931529:03crwdnd2931529:0crwdne2931529:0

crwdns2935425:01crwdne2935425:0

crwdns2936315:0crwdne2936315:0
crwdns2936317:0crwdne2936317:0
crwdns2931653:01crwdne2931653:0
Dell Photo Printer 540 Mother Board Replacement: crwdns2935265:00crwdnd2935265:01crwdnd2935265:03crwdne2935265:0 Dell Photo Printer 540 Mother Board Replacement: crwdns2935265:00crwdnd2935265:02crwdnd2935265:03crwdne2935265:0 Dell Photo Printer 540 Mother Board Replacement: crwdns2935265:00crwdnd2935265:03crwdnd2935265:03crwdne2935265:0
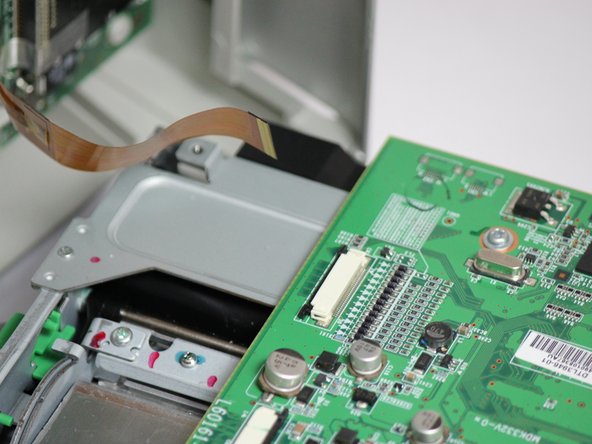
  • Locate the data ribbon that connects the LCD panel to the mother board.

  • Loosen the fasteners next to the ribbon by carefully pushing them away from the white ribbon holder.

  • Once the fasteners are loosened the ribbon should easily slide away from the motherboard.

Localisez le ruban de données qui relie le panneau LCD à la carte mère.

Desserrez les attaches à côté du ruban en les éloignant soigneusement du support de ruban blanc.

Une fois les attaches desserrées, le ruban devrait facilement glisser hors de la carte mère.

crwdns2944171:0crwdnd2944171:0crwdnd2944171:0crwdnd2944171:0crwdne2944171:0