crwdns2933423:0crwdne2933423:0

Remplacement de la carte mère du Lenovo Yoga Tab 3 10

crwdns2935425:01crwdne2935425:0

crwdns2936315:0crwdne2936315:0
crwdns2936317:0crwdne2936317:0
crwdns2931653:01crwdne2931653:0
Lenovo Yoga Tab 3  10 Motherboard Replacement: crwdns2935265:00crwdnd2935265:01crwdnd2935265:03crwdne2935265:0 Lenovo Yoga Tab 3  10 Motherboard Replacement: crwdns2935265:00crwdnd2935265:02crwdnd2935265:03crwdne2935265:0 Lenovo Yoga Tab 3  10 Motherboard Replacement: crwdns2935265:00crwdnd2935265:03crwdnd2935265:03crwdne2935265:0
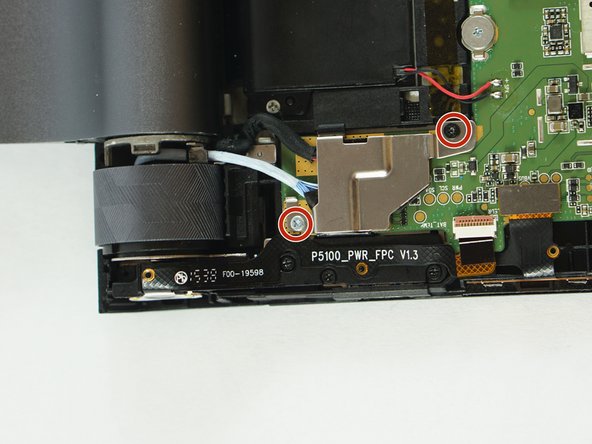
  • Locate the screws in the motherboard the wire cover assembly and the speakers.

  • Use the J000 screwdriver to remove the screws on the motherboard, the wire cover, and the two speakers.

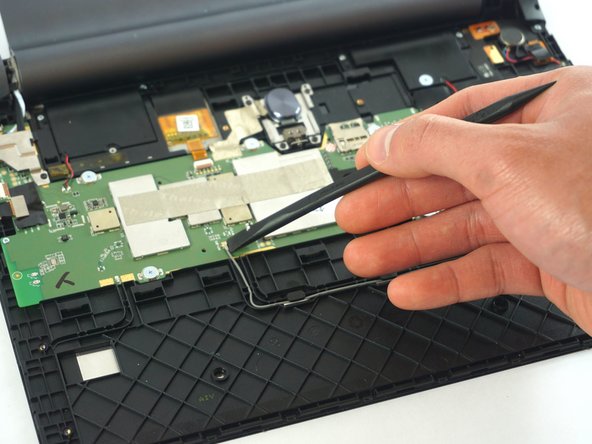
  • Disconnect the wifi connector on the motherboard.

Localisez les vis dans la carte mère, le couvercle de câble et les haut-parleurs.

Utilisez le tournevis J000 pour retirer les vis de la carte mère, du cache-fils et des deux haut-parleurs.

Débranchez le connecteur wifi de la carte mère.

crwdns2944171:0crwdnd2944171:0crwdnd2944171:0crwdnd2944171:0crwdne2944171:0