crwdns2931529:0crwdnd2931529:0crwdnd2931529:0crwdnd2931529:03crwdnd2931529:0crwdne2931529:0
crwdns2935425:02crwdne2935425:0
crwdns2931653:02crwdne2931653:0


-
Place the camera lens face down with the LCD screen face up on a flat surface, or hold it. Carefully lift the camera’s back cover approximately 1 inch.
-
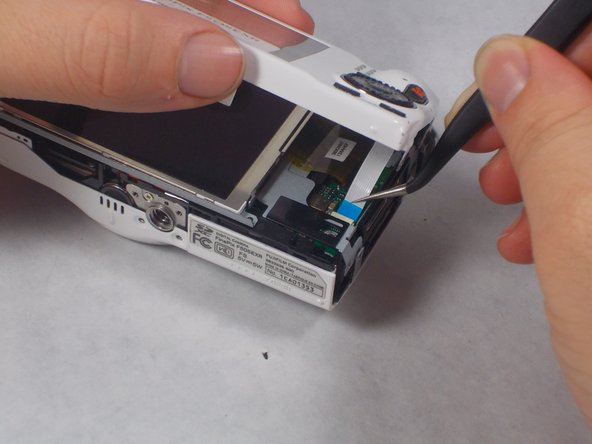
Carefully lift the ribbon clamp connector back using the tweezers and remove the blue ribbon.
| [* black] Place the camera lens face down with the LCD screen face up on a flat surface, or hold it. Carefully lift the camera’s back cover approximately 1 inch. | |
| - | [* black] Carefully lift the ribbon clamp connector back using the tweezers and remove the blue ribbon. |
| + | [* black] Carefully lift the ribbon clamp connector back using the [product|IF145-020|tweezers] and remove the blue ribbon. |
| [* icon_caution] Do ***NOT ***pull on ribbon if the ribbon clamp connector still grasps the blue ribbon. This could cause severe damage to the ribbon. | |
| [* icon_note] If you are replacing the LCD monitor you can skip steps 6 and 7 for the selector button circuit board guide and go directly to the LCD monitor repair guide. | |
| [* icon_note] If you are replacing the Mode Dial you can skip steps 6 and 7 for the selector button circuit board guide and go directly to the Mode Dial repair guide. |
crwdns2944171:0crwdnd2944171:0crwdnd2944171:0crwdnd2944171:0crwdne2944171:0