crwdns2933423:0crwdne2933423:0

Démontage de la Nintendo DS Lite

crwdns2936315:0crwdne2936315:0
crwdns2936317:0crwdne2936317:0
crwdns2931653:027crwdne2931653:0
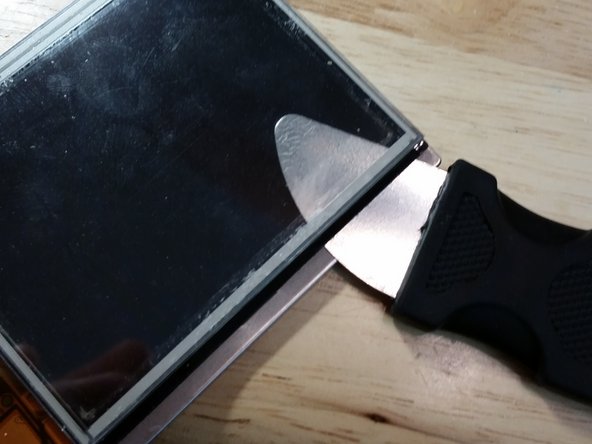
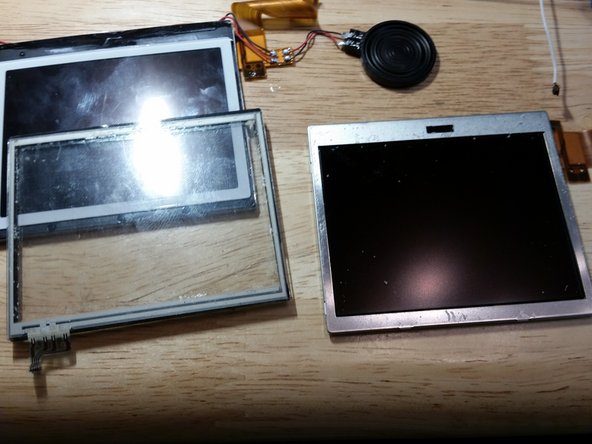
Nintendo DS Lite Disassembly, Remove digitizer: crwdns2935265:00crwdnd2935265:01crwdnd2935265:03crwdne2935265:0 Nintendo DS Lite Disassembly, Remove digitizer: crwdns2935265:00crwdnd2935265:02crwdnd2935265:03crwdne2935265:0 Nintendo DS Lite Disassembly, Remove digitizer: crwdns2935265:00crwdnd2935265:03crwdnd2935265:03crwdne2935265:0
Remove digitizer
  • Slide the metal spudger under the black sticker and carefully work your way around the assembly, avoiding the flex cables. This step is easier than it looks, but only perform this step if the screen or the digitizer needs to be replaced. If both are functional, this step is unnecessary. Thoroughly clean both pieces with alcohol afterwards.

Glissez le Jimmy sous l’autocollant noir et faites soigneusement le tour de l’ensemble en évitant les nappes. Cette étape est plus facile qu’elle en a l’air, mais n’effectuez cette étape que si l’écran ou la vitre tactile doive être remplacé. Si les deux sont fonctionnels, cette étape n’est pas nécessaire.

Nettoyez soigneusement les deux pièces avec de l’alcool par la suite.

crwdns2944171:0crwdnd2944171:0crwdnd2944171:0crwdnd2944171:0crwdne2944171:0