crwdns2933423:0crwdne2933423:0

Nexus 5X LCD Screen & Digitizer Replacement

crwdns2935425:01crwdne2935425:0

crwdns2936315:0crwdne2936315:0
crwdns2936325:0crwdne2936325:0
crwdns2931653:01crwdne2931653:0
Nexus 5X LCD Screen & Digitizer Replacement: crwdns2935265:00crwdnd2935265:01crwdnd2935265:03crwdne2935265:0 Nexus 5X LCD Screen & Digitizer Replacement: crwdns2935265:00crwdnd2935265:02crwdnd2935265:03crwdne2935265:0 Nexus 5X LCD Screen & Digitizer Replacement: crwdns2935265:00crwdnd2935265:03crwdnd2935265:03crwdne2935265:0
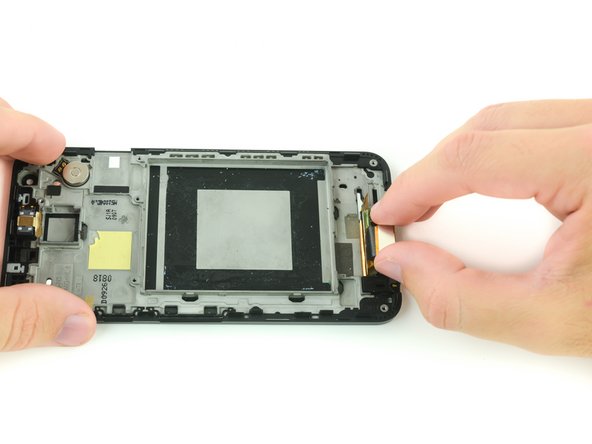
  • Use an iOpener or a heat gun over the digitizer ribbon cable to soften the adhesive that secures it to the plastic housing.

  • The Nexus 5X pictured here does not have a layer of shielding tape over the digitizer panel. If this tape is present on your device, simply peel it away from the plastic frame to free the digitizer panel.

  • You'll need to transfer or replace this strip of shielding tape when you install your new screen.

  • Gently wedge the flat end of a spudger into the gap between the battery housing and the digitizer ribbon cable, or use your fingers to gently pull the digitizer ribbon cable free.

crwdns2935429:0crwdne2935429:0

crwdns2935429:0crwdne2935429:0

crwdns2935429:0crwdne2935429:0

crwdns2935429:0crwdne2935429:0

crwdns2944171:0crwdnd2944171:0crwdnd2944171:0crwdnd2944171:0crwdne2944171:0