crwdns2931529:0crwdnd2931529:0crwdnd2931529:0crwdnd2931529:02crwdnd2931529:0crwdne2931529:0
crwdns2935425:04crwdne2935425:0
crwdns2931653:04crwdne2931653:0


-
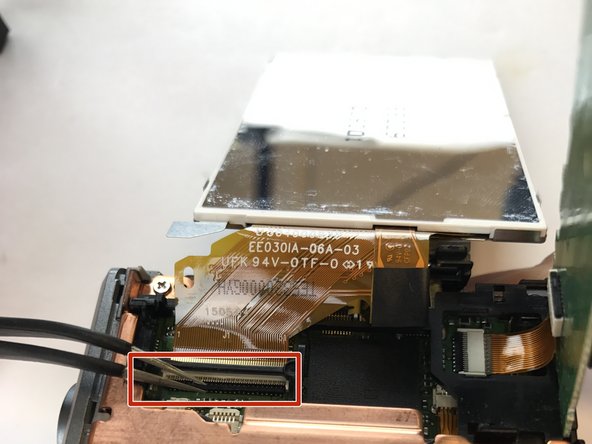
Turn the LCD screen over to the side exposing the connection to the motherboard.
-
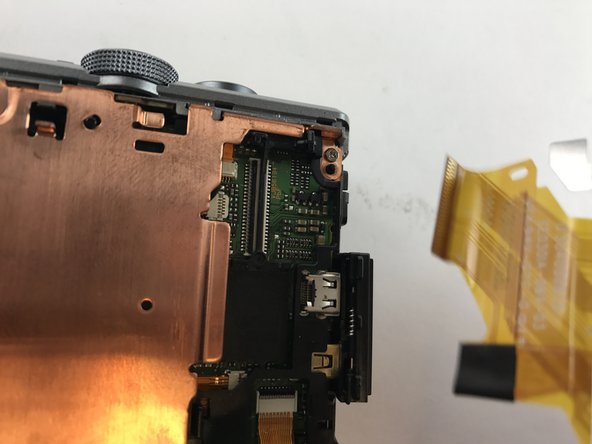
Remove the display data cable connecting the LCD screen to the motherboard. Using tweezers, pry up the black retaining flap then gently pull the display data cable free.
| [* black] Turn the LCD screen over to the side exposing the connection to the motherboard. | |
| - | [* red] Remove the display data cable connecting the LCD screen to the motherboard. Using tweezers, pry up the black retaining flap then gently pull the display data cable free. |
| + | [* red] Remove the display data cable connecting the LCD screen to the motherboard. Using [product|IF145-020|tweezers], pry up the black retaining flap then gently pull the display data cable free. |
| [* icon_caution] Be careful when handling any display data cables in the camera as they are prone to tearing. | |
| [* icon_reminder] To close for reassembly, slide the display data cable back into the ZIF connector and close the retaining flap. |
crwdns2944171:0crwdnd2944171:0crwdnd2944171:0crwdnd2944171:0crwdne2944171:0