crwdns2933423:0crwdne2933423:0

Desmontaje de la Nintendo Wii

crwdns2931527:0crwdnd2931527:0crwdnd2931527:0crwdnd2931527:0crwdne2931527:0

crwdns2936315:0crwdne2936315:0
crwdns2936331:0crwdne2936331:0
crwdns2931653:09crwdne2931653:0
Nintendo Wii Teardown: crwdns2935265:00crwdnd2935265:01crwdnd2935265:03crwdne2935265:0 Nintendo Wii Teardown: crwdns2935265:00crwdnd2935265:02crwdnd2935265:03crwdne2935265:0 Nintendo Wii Teardown: crwdns2935265:00crwdnd2935265:03crwdnd2935265:03crwdne2935265:0
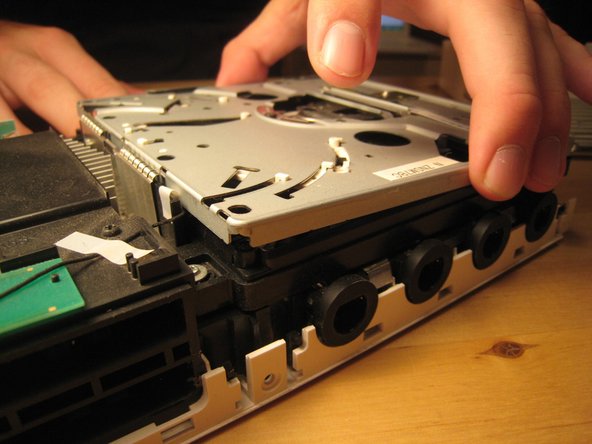
  • We lifted up the cover of the optical drive by removing the six Phillips #00 screws. These are all labeled on the previous image.

  • Because of a secured wire leading to the drive, we reattached the cover to facilitate the remove of the entire drive assembly without harming any of the electronics.

  • There are a ton of parts in the optical drive, but there is nothing very fancy about this drive compared to other slot-loading drives, so I didn't take it apart completely. There are also a ton of gears and levers that I did not want to deal with.

Levantamos la tapa de la unidad óptica quitando los seis tornillos Phillips #00. Todos ellos están etiquetados en la imagen anterior.

Debido a un cable seguro que conduce a la unidad, volvimos a colocar la cubierta para facilitar la extracción de todo el conjunto de la unidad sin dañar ninguno de los componentes electrónicos.

Hay un montón de piezas en la unidad óptica, pero no hay nada muy elegante en esta unidad en comparación con otras unidades de carga por ranura, por lo que no la desarmé por completo. También hay un montón de engranajes y palancas con los que no quería lidiar.

crwdns2944171:0crwdnd2944171:0crwdnd2944171:0crwdnd2944171:0crwdne2944171:0