crwdns2933423:0crwdne2933423:0

Sony Handycam DCR-DVD650 Motherboard Replacement

crwdns2931527:0crwdnd2931527:0crwdnd2931527:0crwdnd2931527:0crwdne2931527:0

crwdns2935425:01crwdne2935425:0

crwdns2936315:0crwdne2936315:0
crwdns2936311:0crwdne2936311:0
crwdns2931653:01crwdne2931653:0
Sony Handycam DCR-DVD650 Motherboard Replacement: crwdns2935265:00crwdnd2935265:01crwdnd2935265:03crwdne2935265:0 Sony Handycam DCR-DVD650 Motherboard Replacement: crwdns2935265:00crwdnd2935265:02crwdnd2935265:03crwdne2935265:0 Sony Handycam DCR-DVD650 Motherboard Replacement: crwdns2935265:00crwdnd2935265:03crwdnd2935265:03crwdne2935265:0
  • After the disc door is separated from the frame, set aside.

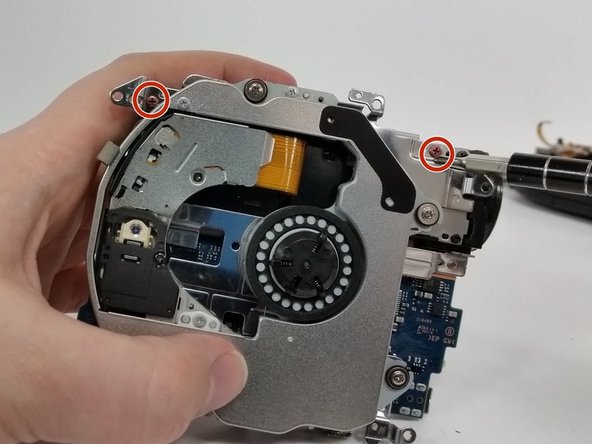
  • Remove the two bronze screws (2mm, Phillips #00) at the top of the metal frame.

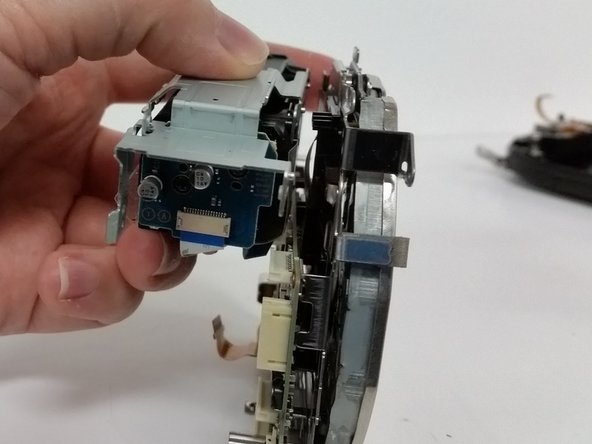
  • Separate the disc reading frame from the optical housing frame and set the optical housing aside.

crwdns2935429:0crwdne2935429:0

crwdns2935429:0crwdne2935429:0

crwdns2935429:0crwdne2935429:0

crwdns2944171:0crwdnd2944171:0crwdnd2944171:0crwdnd2944171:0crwdne2944171:0