crwdns2933423:0crwdne2933423:0

Remplacement de l'interrupteur du Hyperkin Retron 3

crwdns2935425:01crwdne2935425:0

crwdns2936315:0crwdne2936315:0
crwdns2936317:0crwdne2936317:0
crwdns2931653:01crwdne2931653:0
Hyperkin Retron 3 Power Switch Replacement, Arrangment and Removal: crwdns2935265:00crwdnd2935265:01crwdnd2935265:02crwdne2935265:0 Hyperkin Retron 3 Power Switch Replacement, Arrangment and Removal: crwdns2935265:00crwdnd2935265:02crwdnd2935265:02crwdne2935265:0
Arrangment and Removal
  • As stated in the disassembly guide it's easiest to rest the upper shell on the front right corner of the system due to cable length restriction. The same will hold true here. I found it easiest to lift the main PCB at a 90 degree angle resting against the upper shell. Mind you the main PCB will be resting on the Genesis controller port PCB

  • Try to stabilize the NES controller board so that the cables don't become disconnected. If they do, you'll have to fight through the glue in order to resolder the cable.

  • NES controller boards location.

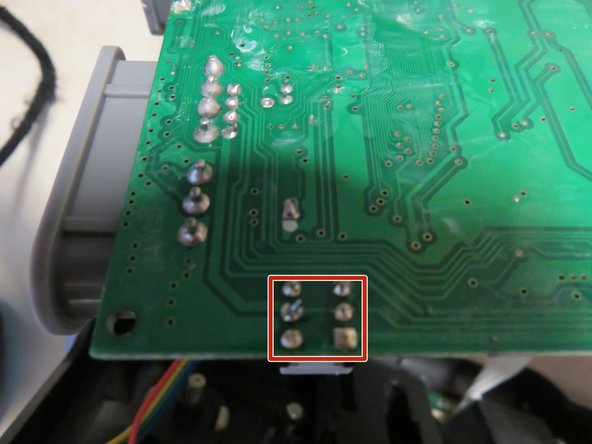
  • This is where your defective switch and it's 6 pins would be located looking at it from a downward angle.

  • Once you've got the PCBs arranged in a way where they won't fall over you can begin to remove the switch. Either using a braid/pump/bridge the 6 pins that are soldered to the through holes of the main PCB and remove your defective on/off switch.

  • Mine has already been replaced so pictures will not depict what the board looks like without the switch.

Comme indiqué dans le guide de démontage, il est plus facile de reposer la coque supérieure sur le coin avant droit du système en raison de la restriction de la longueur du câble. Il en sera de même ici. J'ai trouvé qu'il était plus facile de soulever le PCB principal à un angle de 90 degrés en appui contre la coque supérieure.

Essayez de stabiliser la carte contrôleur NES afin que les câbles ne se déconnectent pas. S'ils le font, vous devrez vous battre à travers la colle afin de ressouder le câble.

Emplacement des cartes de contrôleur NES.

C'est là que votre interrupteur défectueux et ses 6 broches seraient situés en le regardant sous un angle descendant.

Une fois que vous avez disposé les circuits imprimés de manière à ce qu'ils ne tombent pas, vous pouvez commencer à retirer le commutateur. Soit en utilisant une tresse/pompe/pont les 6 broches qui sont soudées aux trous traversants du PCB principal et retirez votre interrupteur marche/arrêt défectueux.

Le mien a déjà été remplacé, donc les images ne montreront pas à quoi ressemble la carte sans le commutateur.

crwdns2944171:0crwdnd2944171:0crwdnd2944171:0crwdnd2944171:0crwdne2944171:0