crwdns2933423:0crwdne2933423:0

Casio fx-82MS Button Replacement

crwdns2936315:0crwdne2936315:0
crwdns2936321:0crwdne2936321:0
crwdns2931653:04crwdne2931653:0
Casio fx-82MS Button Replacement: crwdns2935265:00crwdnd2935265:01crwdnd2935265:02crwdne2935265:0 Casio fx-82MS Button Replacement: crwdns2935265:00crwdnd2935265:02crwdnd2935265:02crwdne2935265:0
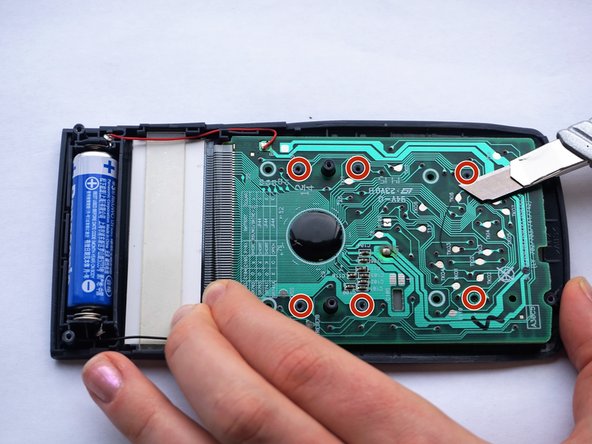
  • Locate the rubber contact points.

  • Solder the rubber contact points, while using the spudger to pry the PCB loose.

  • PCB stands for Printed Circuit Board.

  • Toxic gasses might be created. Hence, do this in a well ventilated room.

  • Start with the lower plugs (left on the photo). Gently pry the PCB loose at the same time.

  • For this step a third person is required for safety. One person uses the solder iron, the other one uses the spudger to pry the PCB loose.

  • If you don't have accessibility to a solder iron, use a utility knife to remove the plugs.

crwdns2935429:0crwdne2935429:0

crwdns2935429:0crwdne2935429:0

crwdns2935429:0crwdne2935429:0

crwdns2935429:0crwdne2935429:0

crwdns2935429:0crwdne2935429:0

crwdns2935429:0crwdne2935429:0

crwdns2935429:0crwdne2935429:0

crwdns2944171:0crwdnd2944171:0crwdnd2944171:0crwdnd2944171:0crwdne2944171:0