crwdns2933423:0crwdne2933423:0

Sega Dreamcast Controller Restoration/Retro Console Restoration

crwdns2936315:0crwdne2936315:0
crwdns2936325:0crwdne2936325:0
crwdns2931653:010crwdne2931653:0
Sega Dreamcast Controller Restoration/Retro Console Restoration, Apply Novus Polish #1: crwdns2935265:00crwdnd2935265:01crwdnd2935265:03crwdne2935265:0 Sega Dreamcast Controller Restoration/Retro Console Restoration, Apply Novus Polish #1: crwdns2935265:00crwdnd2935265:02crwdnd2935265:03crwdne2935265:0 Sega Dreamcast Controller Restoration/Retro Console Restoration, Apply Novus Polish #1: crwdns2935265:00crwdnd2935265:03crwdnd2935265:03crwdne2935265:0
Apply Novus Polish #1
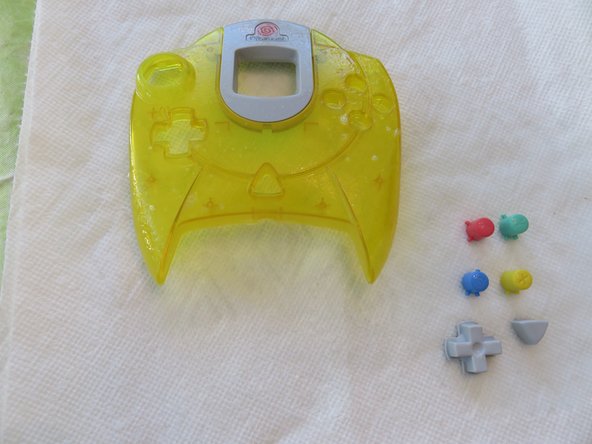
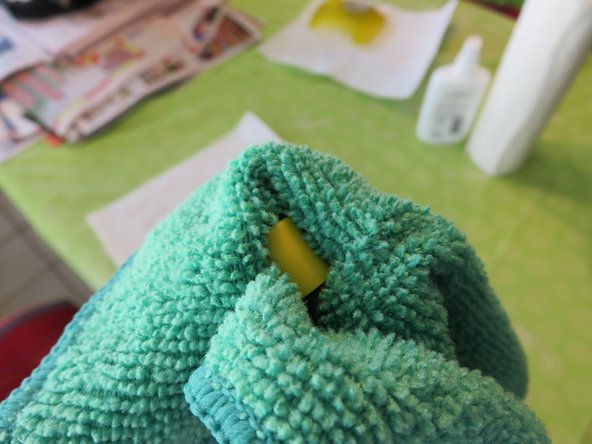
  • Place your buttons, and front controller shell on a clean paper towel. Face the buttons upward so any residual polish drips onto the sides. Following the directions on the back of the bottle, spray the Novus Polish #1 on the top of the shell and buttons. Let them sit for a moment and wipe them dry with a clean microfiber or lint free cloth.

  • Use the same rag to wipe the inside of the shell to remove any dried up water marks that remain from the washing.

  • Take care around the screw posts as they can break off. If this happens simply reattach the broken piece with a small amount of super glue/crazy glue.

  • Don't totally rush the reassembly process. Make sure EVERYTHING is dry before proceeding. Place a small fan in front of all your wet/damp pieces for faster dry times or even better use an airgun and you can usually remove most of the moisture. Depending on the time of day I might just let the pieces sit over night to air dry.

crwdns2935429:0crwdne2935429:0

crwdns2935429:0crwdne2935429:0

crwdns2935429:0crwdne2935429:0

crwdns2935429:0crwdne2935429:0

crwdns2944171:0crwdnd2944171:0crwdnd2944171:0crwdnd2944171:0crwdne2944171:0