crwdns2933423:0crwdne2933423:0

Remplacement de l'écran LED du Zeepad 7DRK

crwdns2936315:0crwdne2936315:0
crwdns2936317:0crwdne2936317:0
crwdns2931653:05crwdne2931653:0
Zeepad 7DRK LED Screen  Replacement: crwdns2935265:00crwdnd2935265:01crwdnd2935265:03crwdne2935265:0 Zeepad 7DRK LED Screen  Replacement: crwdns2935265:00crwdnd2935265:02crwdnd2935265:03crwdne2935265:0 Zeepad 7DRK LED Screen  Replacement: crwdns2935265:00crwdnd2935265:03crwdnd2935265:03crwdne2935265:0
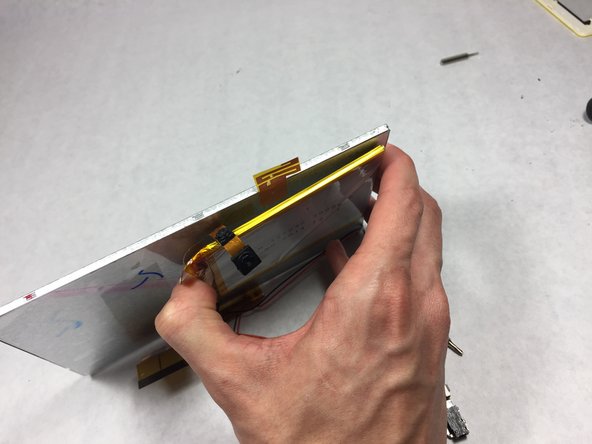
  • First, peel the clear yellow tape off to detach the battery from different wires and the metal.

  • Next, peel the battery off the double sided tape to remove it from the metal.

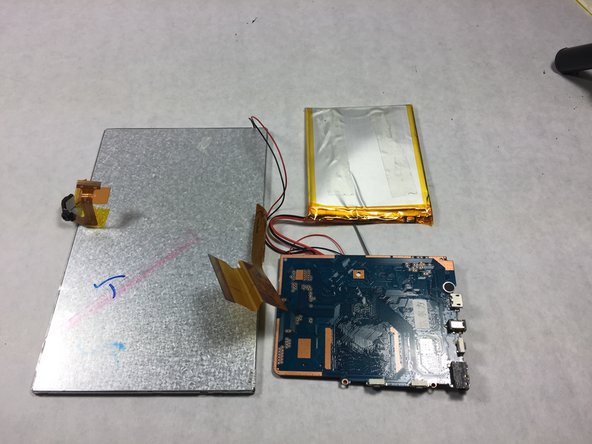
  • Both the battery and and the motherboard will still be attached to some wires, these wires are soldered connections, do your best to avoid breaking these connections.

D'abord, retirez le ruban adhésif jaune clair pour détacher la batterie des différents fils et du métal.

Ensuite, retirez la batterie du ruban adhésif double face pour l'enlever du métal.

Tant la batterie et la carte mère seront encore attachés à certains fils, ces fils sont des connexions soudées, faites de votre mieux pour éviter de briser ces connexions.

crwdns2944171:0crwdnd2944171:0crwdnd2944171:0crwdnd2944171:0crwdne2944171:0