crwdns2933423:0crwdne2933423:0

Nintendo 3DS XL 2015 スピーカーの交換

crwdns2931527:0crwdnd2931527:0crwdnd2931527:0crwdnd2931527:0crwdne2931527:0

crwdns2935425:01crwdne2935425:0

crwdns2936315:0crwdne2936315:0
crwdns2936323:0crwdne2936323:0
crwdns2931653:01crwdne2931653:0
Nintendo 3DS XL 2015 Speakers Replacement: crwdns2935265:00crwdnd2935265:01crwdnd2935265:03crwdne2935265:0 Nintendo 3DS XL 2015 Speakers Replacement: crwdns2935265:00crwdnd2935265:02crwdnd2935265:03crwdne2935265:0 Nintendo 3DS XL 2015 Speakers Replacement: crwdns2935265:00crwdnd2935265:03crwdnd2935265:03crwdne2935265:0
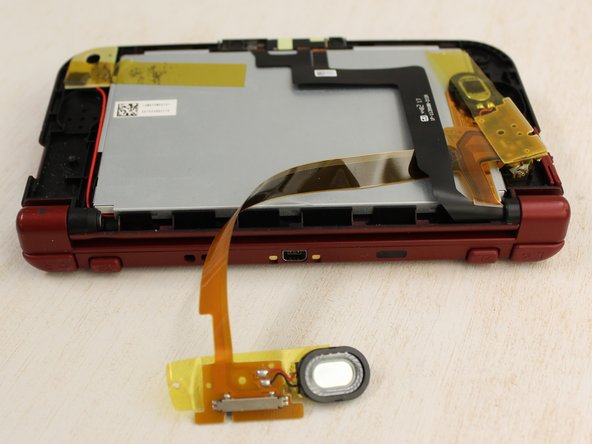
  • The speakers are on the left and right side of the 3DS, and are held down by tape.

  • Before lifting the tape up, the speaker on the right side has two input films. Carefully detach each speaker film from their respective ZIF (zero insertion force) connectors. These are the paper thin ribbons that have orange stripes along them

  • Slowly lift the tape from the speaker.

  • The speakers are soldered onto the circuit board.

スピーカーは3DSの左右にあり、テープで固定されています。

テープを持ち上げる前に、右側のスピーカーには2つの入力フィルムがあります。 各スピーカーフィルムをそれぞれのZIFコネクタから慎重に取り外します。 これらは、オレンジのストライプが付いた紙の薄いリボンです。

スピーカーからテープをゆっくりと剥がします。

スピーカーは回路基板に半田付けされています。

crwdns2944171:0crwdnd2944171:0crwdnd2944171:0crwdnd2944171:0crwdne2944171:0