crwdns2933423:0crwdne2933423:0

Nintendo 3DS XL 2015 Lautsprecher tauschen

crwdns2931527:0crwdnd2931527:0crwdnd2931527:0crwdnd2931527:0crwdne2931527:0

crwdns2935425:01crwdne2935425:0

crwdns2936315:0crwdne2936315:0
crwdns2936319:0crwdne2936319:0
crwdns2931653:01crwdne2931653:0
Nintendo 3DS XL 2015 Speakers Replacement: crwdns2935265:00crwdnd2935265:01crwdnd2935265:03crwdne2935265:0 Nintendo 3DS XL 2015 Speakers Replacement: crwdns2935265:00crwdnd2935265:02crwdnd2935265:03crwdne2935265:0 Nintendo 3DS XL 2015 Speakers Replacement: crwdns2935265:00crwdnd2935265:03crwdnd2935265:03crwdne2935265:0
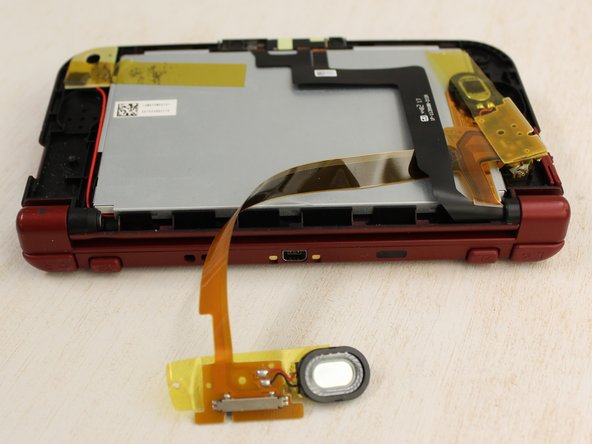
  • The speakers are on the left and right side of the 3DS, and are held down by tape.

  • Before lifting the tape up, the speaker on the right side has two input films. Carefully detach each speaker film from their respective ZIF (zero insertion force) connectors. These are the paper thin ribbons that have orange stripes along them

  • Slowly lift the tape from the speaker.

  • The speakers are soldered onto the circuit board.

Die beiden Lautsprecher sind auf der linken und rechten Seite der 3DS mit Klebeband befestigt.

Bevor du das Klebeband abziehen kannst, musst du erst die beiden Flachbandkabel an der rechten Seite ablösen. Diese papierdünnen Flachbandkabel sind mit orangenen Streifen bedruckt. Hole jedes sehr vorsichtig aus seinem ZIF-Anschluss heraus.

Ziehe das Klebeband langsam vom Lautsprecher ab.

Die Lautsprecher sind noch mit der Hauptplatine verlötet.

crwdns2944171:0crwdnd2944171:0crwdnd2944171:0crwdnd2944171:0crwdne2944171:0