crwdns2933423:0crwdne2933423:0

Demontage van de MacBook Pro 13" Touch Bar

crwdns2936315:0crwdne2936315:0
crwdns2936313:0crwdne2936313:0
crwdns2931653:08crwdne2931653:0
MacBook Pro 13" Touch Bar Teardown: crwdns2935265:00crwdnd2935265:01crwdnd2935265:02crwdne2935265:0 MacBook Pro 13" Touch Bar Teardown: crwdns2935265:00crwdnd2935265:02crwdnd2935265:02crwdne2935265:0
  • We're ready to remove the rest of the peripherals. It'd be great to get a look at the battery, fans, heat sink, and speakers. Except we can't.

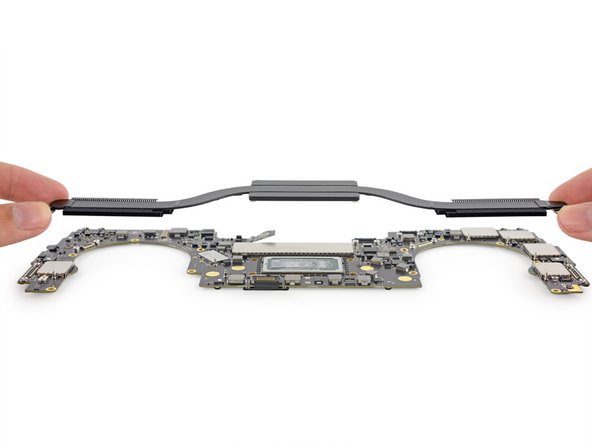
  • The symmetrical logic board keeps guard over the remaining components, so we spudger off its connecting cables and wrest it free from the case.

  • The heat sink is attached to the logic board with screws on the bottom. With the board out of the case, we're able to remove the heat sink for inspection—with a heat pipe running in each direction, it's got twice the pipe of the entry-level model.

We zijn klaar om de rest van de buitenkant te verwijderen. Het zou tof zijn als we een kijkje konden krijgen in de batterij, de ventilatoren, het koellichaam en de speakers. Tenzij we dat niet kunnen.

Het symmetrische logic board houdt de wacht bij de rest van de onderdelen, dus we halen de aansluiting los en bevrijden het uit de behuizing.

Het koellichaam is aan de onderkant aan het logic board vastgeschroefd. Nu we het logic board uit de behuizing hebben gehaald, zijn we ook in staat om het koellichaam te verwijderen voor een integere inspectie—met een afvoerpijp in beide richtingen heeft het twee keer zoveel pijp als het entry-level model.

crwdns2944171:0crwdnd2944171:0crwdnd2944171:0crwdnd2944171:0crwdne2944171:0