crwdns2933423:0crwdne2933423:0

MacBook Pro 13" Touch Bar Teardown

crwdns2936315:0crwdne2936315:0
crwdns2936319:0crwdne2936319:0
crwdns2931653:08crwdne2931653:0
MacBook Pro 13" Touch Bar Teardown: crwdns2935265:00crwdnd2935265:01crwdnd2935265:02crwdne2935265:0 MacBook Pro 13" Touch Bar Teardown: crwdns2935265:00crwdnd2935265:02crwdnd2935265:02crwdne2935265:0
  • We're ready to remove the rest of the peripherals. It'd be great to get a look at the battery, fans, heat sink, and speakers. Except we can't.

  • The symmetrical logic board keeps guard over the remaining components, so we spudger off its connecting cables and wrest it free from the case.

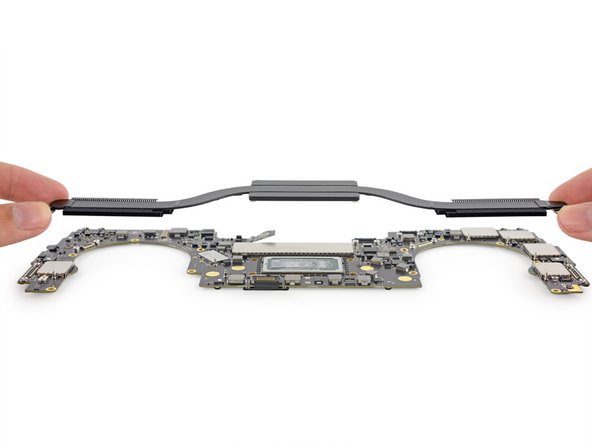
  • The heat sink is attached to the logic board with screws on the bottom. With the board out of the case, we're able to remove the heat sink for inspection—with a heat pipe running in each direction, it's got twice the pipe of the entry-level model.

Wir sind bereit, die restlichen Peripheriekomponenten zu entfernen. Es wäre toll, wenn wir einen Blick auf den Akku, die Lüfter, den Kühlkörper und die Lautsprecher werfen könnten. Aber leider geht das nicht.

Das symmetrische Logic Board bewacht die restlichen Komponenten, sodass wir zunächst mit dem Spudger die Verbindungskabel lösen und das Logic Board aus dem Gehäuse herausholen müssen.

Der Kühlköper ist unten mit Schrauben am Logic Board befestigt. Nach dem Ausbau des Logic Boards aus dem Gehäuse können wir den Kühlkörper entfernen, um ihn genauer zu untersuchen. Ein Wärmerohr führt in jede Richtung, das heißt es hat doppelt soviel Rohrlänge wie das Einsteigermodell.

crwdns2944171:0crwdnd2944171:0crwdnd2944171:0crwdnd2944171:0crwdne2944171:0