crwdns2933423:0crwdne2933423:0

Démontage du D-link DI-524

crwdns2936315:0crwdne2936315:0
crwdns2936317:0crwdne2936317:0
crwdns2931653:03crwdne2931653:0
D-link DI-524 Teardown, Removing the board: crwdns2935265:00crwdnd2935265:01crwdnd2935265:03crwdne2935265:0 D-link DI-524 Teardown, Removing the board: crwdns2935265:00crwdnd2935265:02crwdnd2935265:03crwdne2935265:0 D-link DI-524 Teardown, Removing the board: crwdns2935265:00crwdnd2935265:03crwdnd2935265:03crwdne2935265:0
Removing the board
  • With the plastic removed, we get a look at the board itself. Now remove the two other screws at the back (also marked out in orange).

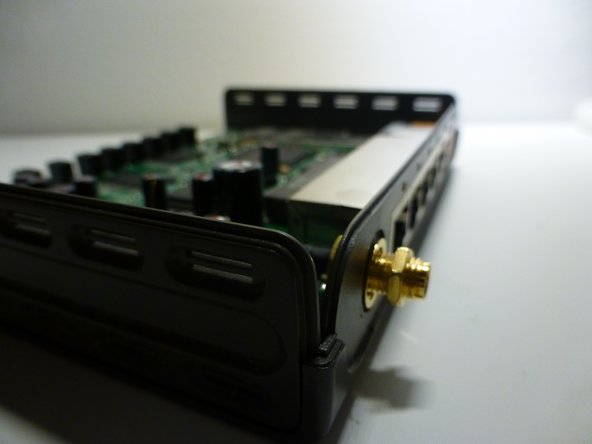
  • Before being able to lift the whole board out, you will also have to unscrew a nut where the antenna was attached to. This can easily be done with a pair of pliers.

  • With that done, simply pull the connector out and lift the border 'up and out'.

Une fois le plastique retiré, nous jetons un coup d'œil au tableau lui-même. Retirez maintenant les deux autres vis à l'arrière (également marquées en orange).

Avant de pouvoir soulever toute la carte, vous devrez également dévisser un écrou où l'antenne était fixée. Cela peut facilement être fait avec une paire de pinces.

Une fois cela fait, retirez simplement le connecteur et soulevez la bordure « vers le haut et vers l'extérieur ».

crwdns2944171:0crwdnd2944171:0crwdnd2944171:0crwdnd2944171:0crwdne2944171:0