crwdns2935425:01crwdne2935425:0
crwdns2931653:01crwdne2931653:0


-
Once the back casing on the device has been removed, turn the device over and look for the two cables that need to be disconnected from the motherboard.
-
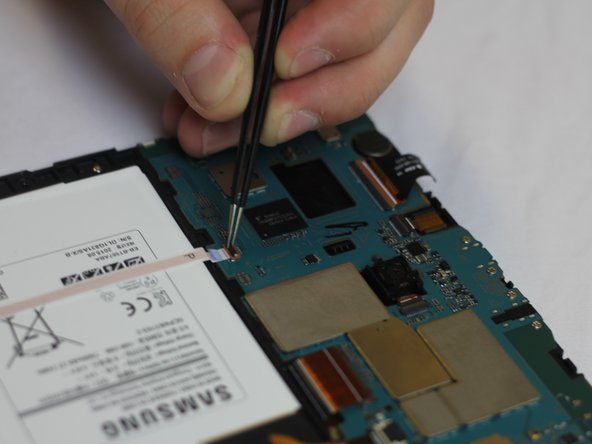
The first cable to be disconnected is a ribbon cable that runs across the entire battery. Using a spundger tool or tweezers, gently lift the black part of the connector upwards towards the battery. Once lifted up, use a pair of tweezers to pull the ribbon cable from its housing.
-
The second cable, which connects the battery to the motherboard, is removed in a similar fashion. First release the housing lock by flipping the back part of the connector upwards. Then remove the cable using a pair of tweezers.
| [* black] Once the back casing on the device has been removed, turn the device over and look for the two cables that need to be disconnected from the motherboard. | |
| - | [* red] The first cable to be disconnected is a ribbon cable that runs across the entire battery. Using a spundger tool or tweezers, gently lift the black part of the connector upwards towards the battery. Once lifted up, use a pair of tweezers to pull the ribbon cable from its housing. |
| + | [* red] The first cable to be disconnected is a ribbon cable that runs across the entire battery. Using a spundger tool or [product|IF145-020|tweezers], gently lift the black part of the connector upwards towards the battery. Once lifted up, use a pair of tweezers to pull the ribbon cable from its housing. |
| [* orange] The second cable, which connects the battery to the motherboard, is removed in a similar fashion. First release the housing lock by flipping the back part of the connector upwards. Then remove the cable using a pair of tweezers. |
crwdns2944171:0crwdnd2944171:0crwdnd2944171:0crwdnd2944171:0crwdne2944171:0