crwdns2933423:0crwdne2933423:0

Remplacement du clavier du Gateway LT2514u

crwdns2931529:0crwdnd2931529:0crwdnd2931529:0crwdnd2931529:04crwdnd2931529:0crwdne2931529:0

crwdns2935425:02crwdne2935425:0

crwdns2936315:0crwdne2936315:0
crwdns2936317:0crwdne2936317:0
crwdns2931653:02crwdne2931653:0
Gateway LT2514u Keyboard Replacement: crwdns2935265:00crwdnd2935265:01crwdnd2935265:03crwdne2935265:0 Gateway LT2514u Keyboard Replacement: crwdns2935265:00crwdnd2935265:02crwdnd2935265:03crwdne2935265:0 Gateway LT2514u Keyboard Replacement: crwdns2935265:00crwdnd2935265:03crwdnd2935265:03crwdne2935265:0
  • After releasing all 5 tabs, carefully lift the keyboard along its top edge until you see the ribbon that connects the keyboard to the motherboard.

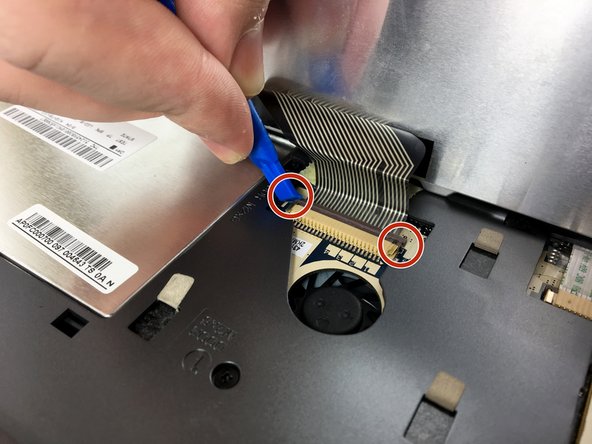
  • Using a plastic opening tool, slide the 2 clips that hold the keyboard ribbon in place outward.

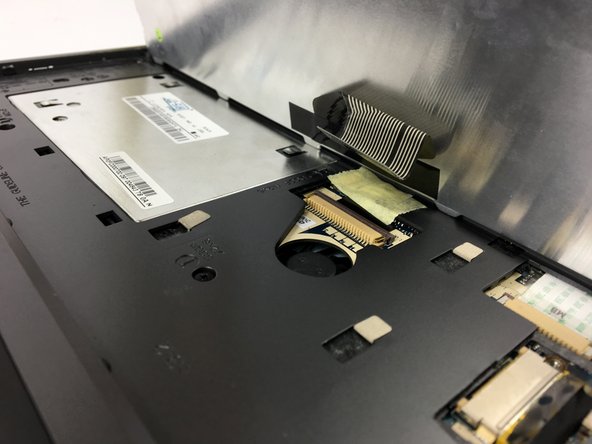
  • Carefully slide the ribbon out and you can now pull the keyboard away from the netbook.

Après avoir libéré les 5 encoches, soulevez le clavier prudemment le long de son côté supérieur jusqu'à ce que vous aperceviez le câble plat qui connecte le clavier à la carte mère.

Avec l'aide d'un outil d'ouverture en plastique, relevez les deux clapets de retenue qui maintiennent le cable plat en place.

Retirez le câble sans forcer et vous pourrez maintenant retirer le clavier de l'ordinateur portable.

crwdns2944171:0crwdnd2944171:0crwdnd2944171:0crwdnd2944171:0crwdne2944171:0