crwdns2933423:0crwdne2933423:0

MacBook Pro 15インチ Core 2 Duoモデル A1226/A1260 ヒートシンクの交換

crwdns2931527:0crwdnd2931527:0crwdnd2931527:0crwdnd2931527:0crwdne2931527:0

crwdns2935425:01crwdne2935425:0

crwdns2936315:0crwdne2936315:0
crwdns2936323:0crwdne2936323:0
crwdns2931653:01crwdne2931653:0
MacBook Pro 15" Core 2 Duo Models A1226 and A1260 Heat Sink Replacement: crwdns2935265:00crwdnd2935265:01crwdnd2935265:02crwdne2935265:0 MacBook Pro 15" Core 2 Duo Models A1226 and A1260 Heat Sink Replacement: crwdns2935265:00crwdnd2935265:02crwdnd2935265:02crwdne2935265:0
  • Gently lift the heat sink out of the computer.

  • Peel back the orange Kapton tape covering the middle thermal sensor.

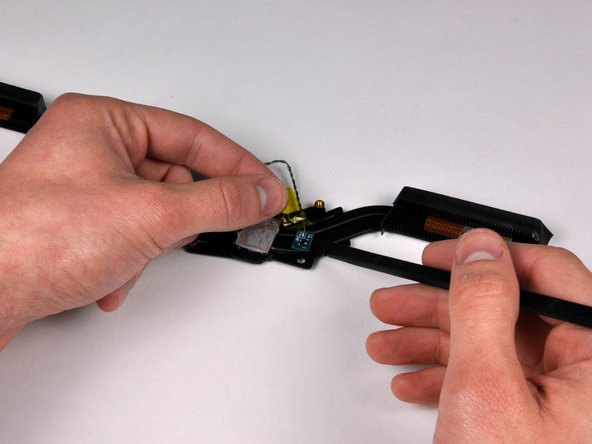
  • Use a spudger to pry the middle thermal sensor off the heat sink.

  • Heat sink remains.

  • If you need to mount the heat sink back into the laptop, we have a thermal paste guide that makes replacing the thermal compound easy.

デバイスからヒートシンクをゆっくりと持ち上げます。

中央のサーマルセンサーを覆っているオレンジのカプトンテープを剥がします。

スパッジャーを使って、中央のサーマルセンサーをヒートシンクからこじ開けます。

ヒートシンクのみが残ります。

ヒートシンクをラップトップに取り付ける際は、サーマルペーストを簡単に交換できる(放熱グリスの塗布)ガイドを参照してください。

crwdns2944171:0crwdnd2944171:0crwdnd2944171:0crwdnd2944171:0crwdne2944171:0