crwdns2933423:0crwdne2933423:0

Installazione dell'unità ottica nel MacBook Pro Core 2 Duo da 15" modelli A1226 e A1260

crwdns2931529:0crwdnd2931529:0crwdnd2931529:0crwdnd2931529:013crwdnd2931529:0crwdne2931529:0

crwdns2935425:02crwdne2935425:0

crwdns2936315:0crwdne2936315:0
crwdns2936321:0crwdne2936321:0
crwdns2931653:02crwdne2931653:0
MacBook Pro 15" Core 2 Duo Models A1226 and A1260 Optical Drive Replacement: crwdns2935265:00crwdnd2935265:01crwdnd2935265:02crwdne2935265:0 MacBook Pro 15" Core 2 Duo Models A1226 and A1260 Optical Drive Replacement: crwdns2935265:00crwdnd2935265:02crwdnd2935265:02crwdne2935265:0
  • Remove the following 4 screws:

  • Two 3.3 mm silver Phillips screws on either side of the SuperDrive.

  • One 4.7 mm silver T6 Torx screw from the top left corner of the drive.

  • One 6.2 mm black Phillips screw at the top right corner of the drive.

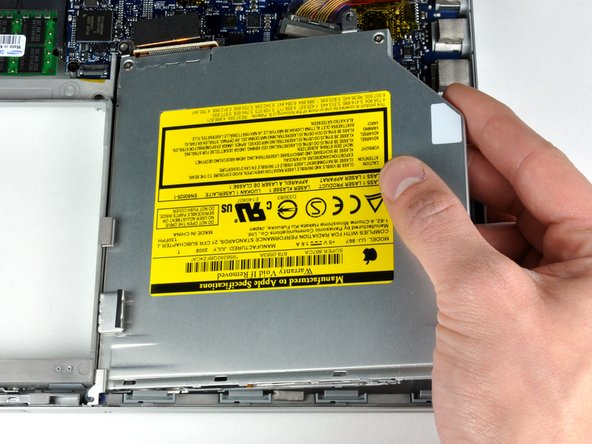
  • Lift the optical drive up and out of the computer.

Rimuovere le 4 viti seguenti:

Due viti con testa a croce argentate da 3,3 mm su entrambi i lati dell'unità SuperDrive.

Una vite Torx T6 argentata da 4,7 mm dall'angolo superiore sinistro dell'unità.

Una vite con testa a croce nera da 6,2 mm dall'angolo superiore destro dell'unità.

Sollevare l'unità ottica e rimuoverla dal computer.

crwdns2944171:0crwdnd2944171:0crwdnd2944171:0crwdnd2944171:0crwdne2944171:0