crwdns2933423:0crwdne2933423:0

Installazione del disco rigido nel MacBook Pro Core 2 Duo da 15" modelli A1226 e A1260

crwdns2931527:0crwdnd2931527:0crwdnd2931527:0crwdnd2931527:0crwdne2931527:0

crwdns2935425:02crwdne2935425:0

crwdns2936315:0crwdne2936315:0
crwdns2936321:0crwdne2936321:0
crwdns2931653:02crwdne2931653:0
MacBook Pro 15" Core 2 Duo Models A1226 and A1260 Hard Drive Replacement: crwdns2935265:00crwdnd2935265:01crwdnd2935265:03crwdne2935265:0 MacBook Pro 15" Core 2 Duo Models A1226 and A1260 Hard Drive Replacement: crwdns2935265:00crwdnd2935265:02crwdnd2935265:03crwdne2935265:0 MacBook Pro 15" Core 2 Duo Models A1226 and A1260 Hard Drive Replacement: crwdns2935265:00crwdnd2935265:03crwdnd2935265:03crwdne2935265:0
  • Remove the two 8.2 mm T6 Torx screws securing the hard drive retaining bracket to the lower case.

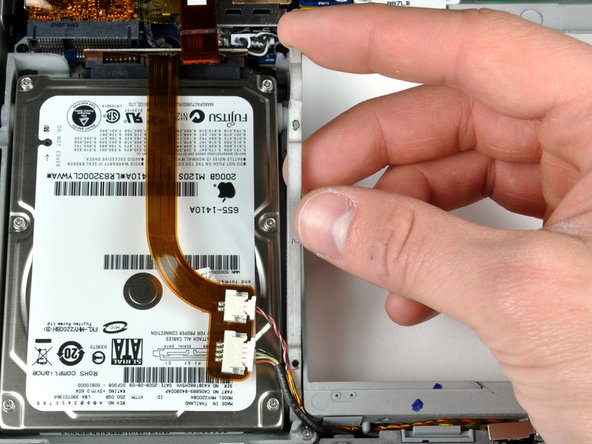
  • Use a spudger if the hard drive ribbon cable is firmly glued to the top of the drive. You might have to work slowly in order to not damage it.

  • Lift the hard drive retaining bracket up and out of the computer.

  • Lift up the hard drive with one hand and use your other hand to disconnect the hard drive cable.

Rimuovere le due viti Torx T6 da 8,2 mm che fissano la staffa di fissaggio del disco rigido al case inferiore.

Usare una spatola si il cavo nastro del disco rigido è fortemente incolloto sulla parte superiore del lettore. Attenzione di lavorare lentamente per evitare di danneggiarlo.

Sollevare la staffa di fissaggio del disco rigido e rimuoverla dal computer.

Sollevare il disco rigido con una mano e utilizzare l'altra per scollegare il relativo cavo.

crwdns2944171:0crwdnd2944171:0crwdnd2944171:0crwdnd2944171:0crwdne2944171:0