crwdns2933423:0crwdne2933423:0

MacBook Pro 15" Core 2 Duo Modelos A1226 y A1260 Reemplazar Disco Duro

crwdns2931527:0crwdnd2931527:0crwdnd2931527:0crwdnd2931527:0crwdne2931527:0

crwdns2935425:02crwdne2935425:0

crwdns2936315:0crwdne2936315:0
crwdns2936331:0crwdne2936331:0
crwdns2931653:02crwdne2931653:0
MacBook Pro 15" Core 2 Duo Models A1226 and A1260 Hard Drive Replacement: crwdns2935265:00crwdnd2935265:01crwdnd2935265:03crwdne2935265:0 MacBook Pro 15" Core 2 Duo Models A1226 and A1260 Hard Drive Replacement: crwdns2935265:00crwdnd2935265:02crwdnd2935265:03crwdne2935265:0 MacBook Pro 15" Core 2 Duo Models A1226 and A1260 Hard Drive Replacement: crwdns2935265:00crwdnd2935265:03crwdnd2935265:03crwdne2935265:0
  • Remove the two 8.2 mm T6 Torx screws securing the hard drive retaining bracket to the lower case.

  • Use a spudger if the hard drive ribbon cable is firmly glued to the top of the drive. You might have to work slowly in order to not damage it.

  • Lift the hard drive retaining bracket up and out of the computer.

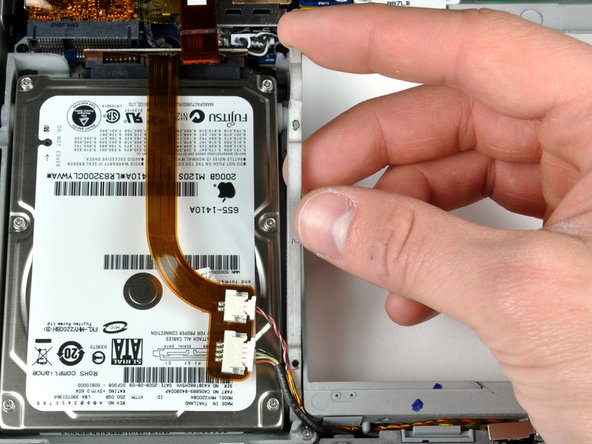
  • Lift up the hard drive with one hand and use your other hand to disconnect the hard drive cable.

Retira los dos tornillos Torx T6 de 8,2 mm que sujetan el soporte de retención del disco duro a la carcasa inferior.

Usa un spudger si el cable plano de la unidad de disco duro está firmemente pegado a la parte superior de la unidad. Es posible que debas trabajar lentamente para no dañarlo.

Levanta el soporte de retención del disco duro hacia arriba y hacia afuera del ordenador.

Levanta el disco duro con una mano y usa la otra mano para desconectar el cable del disco duro.

crwdns2944171:0crwdnd2944171:0crwdnd2944171:0crwdnd2944171:0crwdne2944171:0