crwdns2933423:0crwdne2933423:0

Nintendo 64 ゲームカートリッジバッテリーの交換

crwdns2936315:0crwdne2936315:0
crwdns2936323:0crwdne2936323:0
crwdns2931653:04crwdne2931653:0
Nintendo 64 Game Cartridge Battery Replacement WITHOUT LOSING SAVE FILES., Cartridge Disassembly: crwdns2935265:00crwdnd2935265:01crwdnd2935265:03crwdne2935265:0 Nintendo 64 Game Cartridge Battery Replacement WITHOUT LOSING SAVE FILES., Cartridge Disassembly: crwdns2935265:00crwdnd2935265:02crwdnd2935265:03crwdne2935265:0 Nintendo 64 Game Cartridge Battery Replacement WITHOUT LOSING SAVE FILES., Cartridge Disassembly: crwdns2935265:00crwdnd2935265:03crwdnd2935265:03crwdne2935265:0
Cartridge Disassembly
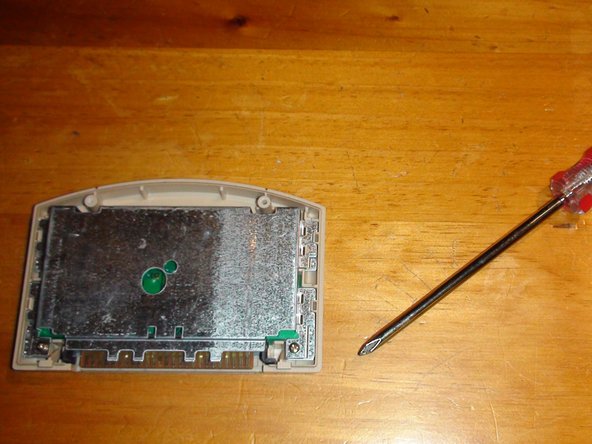
  • Now on to the main event. Start by connecting your 3.8mm Gamebit to your Modular Screwdriver. Use the Screwdriver to undo the two Gamebit screws that hold the cartridge together. Once undone, carefully remove the back cover of the cartridge to expose the inner metal shielding.

  • Now take your Philips-head Screwdriver and undo the two Philips-head screws at the bottom corners of the metal shielding. Remove this metal shielding to expose the cartridge circuit board.

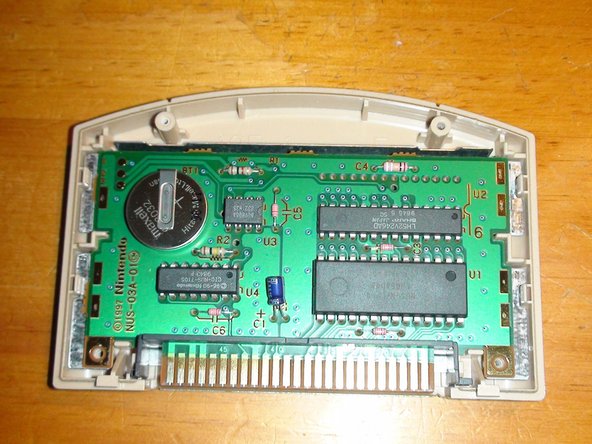
  • You can now see the Cartridge PCB with the attached Coin Battery, the source of the problem which we will soon fix.

  • From here, carefully remove the PCB from the cartridge casing. Remove the black plastic shield on the cartridge pins and place the PCB on your workspace.

さて、メインイベントです。3.8mmゲームビットをモジュラースクリュードライバーに接続します。ドライバーを使って、カートリッジを固定している2本のゲームビットのネジを外します。ネジを外したら、慎重にカートリッジのバックカバーを外し、内部のメタルシールドを露出させます。

次に、プラスヘッドドライバーを手に取り、メタルシールド下側コーナーにある2本のプラスネジを外します。このメタルシールドを外したら、カートリッジの回路基板を露出させます。

コイン電池が装着されたカートリッジPCBが確認できます。この問題の原因は、これからすぐに解決します。

ここから、慎重にPCBをカートリッジの筐体から取り外します。カートリッジピンの黒いプラスチックシールドを外し、PCBを作業スペースに置きます。

crwdns2944171:0crwdnd2944171:0crwdnd2944171:0crwdnd2944171:0crwdne2944171:0