crwdns2933423:0crwdne2933423:0

Desmontaje de Xbox One Power Brick (Day One Edition)

crwdns2936315:0crwdne2936315:0
crwdns2936331:0crwdne2936331:0
crwdns2931653:03crwdne2931653:0
Xbox One Power Brick (Day One Edition) Disassembly, Remove Screws: crwdns2935265:00crwdnd2935265:01crwdnd2935265:03crwdne2935265:0 Xbox One Power Brick (Day One Edition) Disassembly, Remove Screws: crwdns2935265:00crwdnd2935265:02crwdnd2935265:03crwdne2935265:0 Xbox One Power Brick (Day One Edition) Disassembly, Remove Screws: crwdns2935265:00crwdnd2935265:03crwdnd2935265:03crwdne2935265:0
Remove Screws
  • Use a Phillips head screwdriver to remove the two larger screws.

  • The two smaller screws (orange) were a little tricky. They are screwed down very tight. I started with a #0 phillips head and slightly stripped the screw head. Not enough to destroy it. I recommend using a #1 phillips head on these. I also used a small rubber grip in order to get a better grip on my screwdriver. Made it much easier.

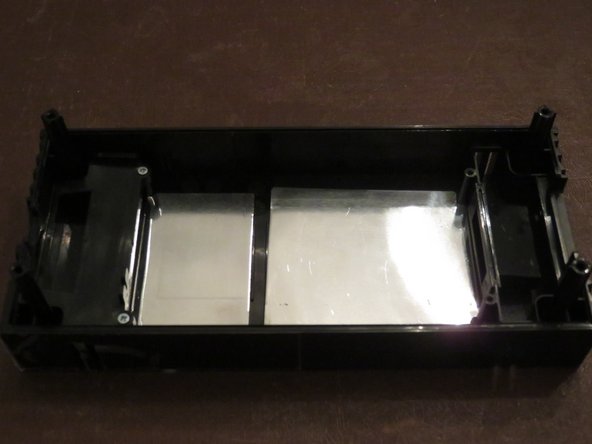
  • Once screws are removed lift the plastic frame from the left side and remove it from the top of the power brick and flip it over.

  • Unlike the X360 power brick, the light diffuser does not need to be removed from the power supply. If you want to remove it anyway simply grab it with your fingers and lift it out.

  • When I used a can of air duster to clean the inside, the smaller metal sheet (left side) immediately blew out. If this happens don't panic. There's tape on the bottom side. Simply put it back in with a little pressure to hold it down and you're good to go.

  • These screws serve no purpose. There was nothing under there. Unless you have a different variation than mine there is no need to remove these screws.

Usa un destornillador Phillips para quitar los dos tornillos más grandes.

Los dos tornillos más pequeños (naranja) fueron un poco complicados. Están atornillados muy fuerte. Comencé con una cabeza Phillips # 0 y se dañó un poco el tornillo. Pero no se destruyó. Recomiendo usar una cabeza Phillips # 1 en estos. También utilicé una pequeña empuñadura de goma para agarrar mejor mi destornillador. Lo hizo mucho más fácil.

Una vez que se quitan los tornillos, levanta el marco de plástico del lado izquierdo y retíralo de la parte superior del bloque de alimentación y voltéalo.

A diferencia de la X360 Power Brick, el difusor de luz no necesita ser retirado de la fuente de alimentación. Si deseas quitarlo de todos modos, simplemente agárralo con los dedos y sácalo.

Cuando utilicé una lata de aire comprimido para limpiar el interior, la lámina de metal más pequeña (lado izquierdo) se rompió de inmediato. Si esto sucede, no te asustes. Hay cinta adhesiva en la parte inferior. Simplemente vuelva a colocarla con un poco de presión para mantenerla presionada y listo.

Estos tornillos no sirven para nada. No había nada debajo. A menos que tengas una versión diferente a la mía, no es necesario quitar estos tornillos.

crwdns2944171:0crwdnd2944171:0crwdnd2944171:0crwdnd2944171:0crwdne2944171:0