crwdns2933423:0crwdne2933423:0

Tefal Turbo Pro 400 Stoomstrijkijzer Demontage

crwdns2936315:0crwdne2936315:0
crwdns2936313:0crwdne2936313:0
crwdns2931653:02crwdne2931653:0
Tefal Turbo Pro 400 Steam Iron Disassembly, Rear cover removal - 2: crwdns2935265:00crwdnd2935265:01crwdnd2935265:03crwdne2935265:0 Tefal Turbo Pro 400 Steam Iron Disassembly, Rear cover removal - 2: crwdns2935265:00crwdnd2935265:02crwdnd2935265:03crwdne2935265:0 Tefal Turbo Pro 400 Steam Iron Disassembly, Rear cover removal - 2: crwdns2935265:00crwdnd2935265:03crwdnd2935265:03crwdne2935265:0
Rear cover removal - 2
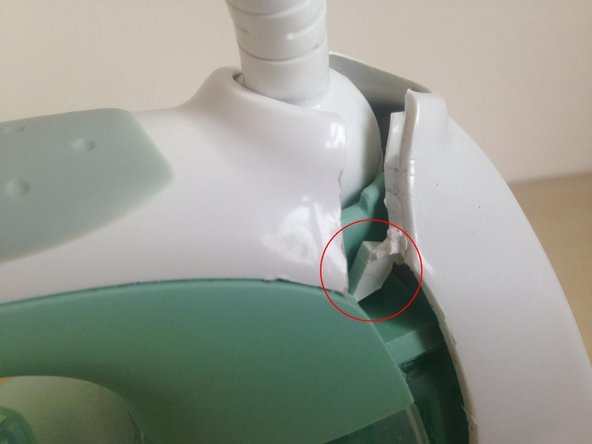
  • Using a nylon spudger, or with care a small flat screwdriver, ease the rear cover away from the main body of the iron on both sides, starting at the top near the cable entry.

  • Once the rear cover starts to come away you can increase the gap created by inserting the spudger a little further down.

  • Note the tab on the rear cover shown in the 3rd photo which was holding the rear cover in place. On reassembly this can't be re-inserted without lifting the top cover (see Step 7 later).

Gebruik een nylon spudger of met wat voorzichtigheid een kleine platte schroevendraaier om de achterklep aan beide kanten los te maken van het hoofdgedeelte van het strijkijzer, te beginnen bij de bovenkant bij de kabelingang.

Zodra de achterklep begint los te komen, kun je de opening vergroten door de spudger iets verder naar beneden te plaatsen.

Let op het lipje op de achterklep die wordt weergegeven op de 3e foto die de achterklep op zijn plaats hield. Bij montage kan deze niet opnieuw worden geplaatst zonder de bovenklep op te tillen (zie stap 7 verderop).

crwdns2944171:0crwdnd2944171:0crwdnd2944171:0crwdnd2944171:0crwdne2944171:0