crwdns2935425:02crwdne2935425:0
crwdns2931653:02crwdne2931653:0


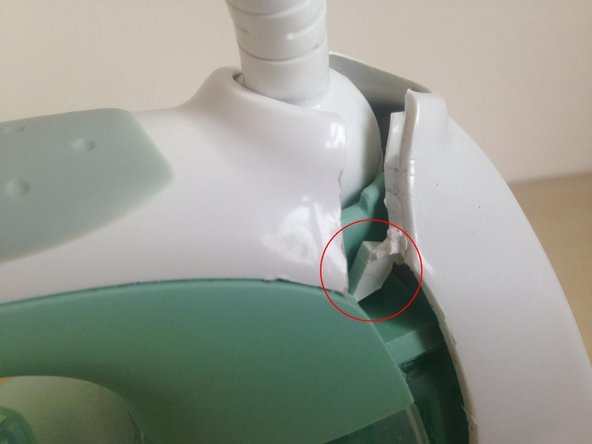


Rear cover removal - 2
-
Using a nylon spudger, or with care a small flat screwdriver, ease the rear cover away from the main body of the iron on both sides, starting at the top near the cable entry.
-
Once the rear cover starts to come away you can increase the gap created by inserting the spudger a little further down.
-
Note the tab on the rear cover shown in the 3rd photo which was holding the rear cover in place. On reassembly this can't be re-inserted without lifting the top cover (see Step 7 later).
crwdns2944171:0crwdnd2944171:0crwdnd2944171:0crwdnd2944171:0crwdne2944171:0