crwdns2933423:0crwdne2933423:0

Sostituzione Antenne Wi-Fi PlayStation 3 Super Slim

crwdns2931527:0crwdnd2931527:0crwdnd2931527:0crwdnd2931527:0crwdne2931527:0

crwdns2935425:01crwdne2935425:0

crwdns2936315:0crwdne2936315:0
crwdns2936321:0crwdne2936321:0
crwdns2931653:01crwdne2931653:0
PlayStation 3 Super Slim Wi-Fi Antennas Replacement: crwdns2935265:00crwdnd2935265:01crwdnd2935265:03crwdne2935265:0 PlayStation 3 Super Slim Wi-Fi Antennas Replacement: crwdns2935265:00crwdnd2935265:02crwdnd2935265:03crwdne2935265:0 PlayStation 3 Super Slim Wi-Fi Antennas Replacement: crwdns2935265:00crwdnd2935265:03crwdnd2935265:03crwdne2935265:0
  • Locate the white flex ribbon cable that connects the power button to the motherboard. Pull this cable out from the motherboard end.

  • Remove the five black 8.3mm long screws with a Phillips #1 screwdriver.

  • Remove the two silver 12.8mm long screws with a Phillips #1 screwdriver.

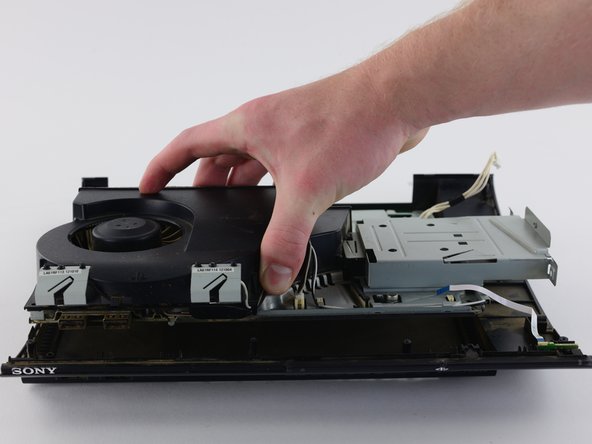
  • Remove the device from the bottom shell casing.

Individua il cavo flessibile bianco che collega il pulsante di accensione alla scheda madre. Tira fuori questo cavo dall'estremità della scheda madre.

Rimuovi le cinque viti nere lunghe 8,3 mm con un cacciavite Phillips #1.

Rimuovi le due viti argentate lunghe 12,8 mm con un cacciavite Phillips #1.

Rimuovi il dispositivo dalla custodia inferiore.

crwdns2944171:0crwdnd2944171:0crwdnd2944171:0crwdnd2944171:0crwdne2944171:0