crwdns2933423:0crwdne2933423:0

Sustitución del Cable del Componente Superior del iPhone 6s

crwdns2931529:0crwdnd2931529:0crwdnd2931529:0crwdnd2931529:03crwdnd2931529:0crwdne2931529:0

crwdns2936315:0crwdne2936315:0
crwdns2936331:0crwdne2936331:0
crwdns2931653:03crwdne2931653:0
iPhone 6s Upper Component Cable Replacement: crwdns2935265:00crwdnd2935265:01crwdnd2935265:03crwdne2935265:0 iPhone 6s Upper Component Cable Replacement: crwdns2935265:00crwdnd2935265:02crwdnd2935265:03crwdne2935265:0 iPhone 6s Upper Component Cable Replacement: crwdns2935265:00crwdnd2935265:03crwdnd2935265:03crwdne2935265:0
  • Try not to wrinkle the strips during this procedure—they will become very difficult to deal with and will not straighten out again.

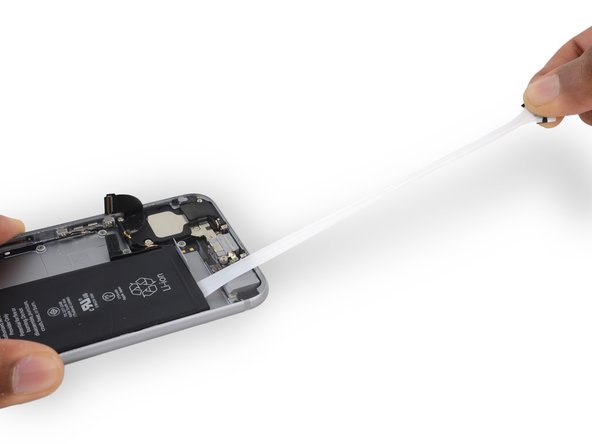
  • Pull one of the adhesive strips straight out, towards the bottom of the iPhone.

  • For best results, pull the strip at a 60º angle or less.

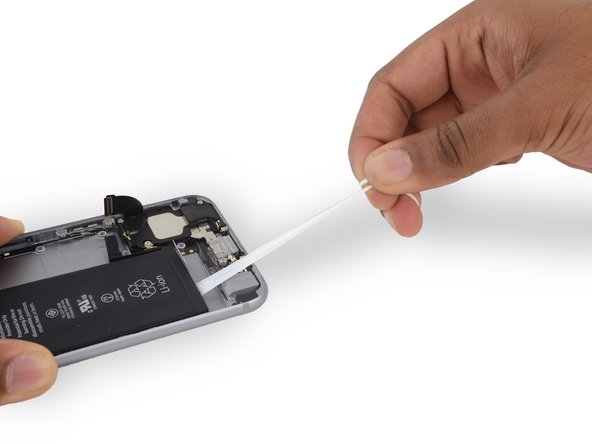
  • The strip will stretch to many times its original length. Continue to pull steadily, re-grabbing the strip closer to the iPhone if necessary.

  • Continue pulling until the strip is fully removed.

  • If the battery adhesive tabs break off at any point during the removal process, use your fingers or blunt tweezers to retrieve the remaining length of adhesive, and continue pulling.

  • If one of the adhesive strips breaks under the battery during this procedure, and cannot be retrieved, remove the remaining strip, and then skip to Step 48.

Trata de no arrugar las tiras durante este procedimiento; se volverán muy difíciles de manejar y no se enderezarán nuevamente.

Tira de una de las tiras adhesivas hacia la parte inferior del iPhone.

Para mejores resultados, tira de la tira en un ángulo de 60º o menos.

La tira se estirará muchas veces su longitud original. Continúa tirando constantemente, volviendo a agarrar la tira más cerca del iPhone si es necesario.

Continúa tirando hasta que la tira se haya quitado por completo.

Si las pestañas adhesivas de la batería se rompen en algún momento durante el proceso de extracción, utiliza los dedos o unas pinzas romas para recuperar el resto del adhesivo y sigue tirando.

Si una de las tiras adhesivas se rompe debajo de la batería durante este procedimiento y no se puede recuperar, quita la tira restante y ves al Paso 48.

crwdns2944171:0crwdnd2944171:0crwdnd2944171:0crwdnd2944171:0crwdne2944171:0