crwdns2933423:0crwdne2933423:0

Elektronica-vaardigheden 101

crwdns2936315:0crwdne2936315:0
crwdns2936313:0crwdne2936313:0
crwdns2931653:035crwdne2931653:0
Electronics Skills Kit 101: crwdns2935265:00crwdnd2935265:01crwdnd2935265:02crwdne2935265:0 Electronics Skills Kit 101: crwdns2935265:00crwdnd2935265:02crwdnd2935265:02crwdne2935265:0
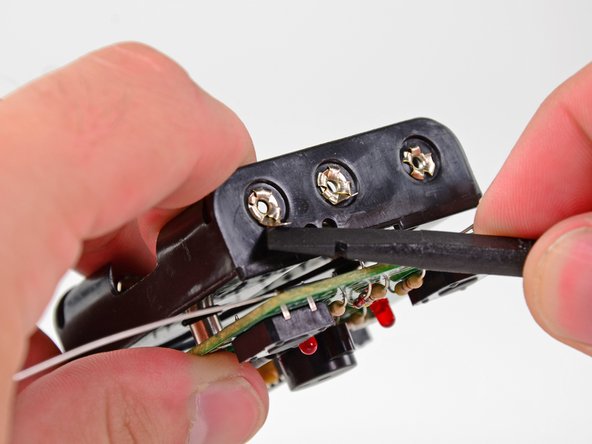
  • Use a spudger to pry the metal rings on the battery terminals up so that they perpendicular to the battery terminals.

  • These rings should be on the same end as the surface mount leads. If they are on opposite ends, the board is on backwards, and you'll need to unscrew the nuts, rotate the circuit board 180°, reinstall the nuts, and tighten the two screws.

Gebruik een spudger om de lipjes van de metalen ringen op de batterijpolen omhoog te duwen zodat ze haaks op de batterijpolen komen te staan.

Deze ringen moeten zich aan dezelfde kant bevinden als de gesoldeerde draden die als snorharen zijn bevestigd. Als ze zich aan de andere kant bevinden, zit de printplaat achterstevoren en zul je de moeren los moeten draaien, de printplaat 180° moeten draaien, de moeren terug moeten plaatsen en de twee schroeven weer vast moeten draaien.

crwdns2944171:0crwdnd2944171:0crwdnd2944171:0crwdnd2944171:0crwdne2944171:0