crwdns2933423:0crwdne2933423:0

Elektronica-vaardigheden 101

crwdns2936315:0crwdne2936315:0
crwdns2936313:0crwdne2936313:0
crwdns2931653:033crwdne2931653:0
Electronics Skills Kit 101: crwdns2935265:00crwdnd2935265:01crwdnd2935265:03crwdne2935265:0 Electronics Skills Kit 101: crwdns2935265:00crwdnd2935265:02crwdnd2935265:03crwdne2935265:0 Electronics Skills Kit 101: crwdns2935265:00crwdnd2935265:03crwdnd2935265:03crwdne2935265:0
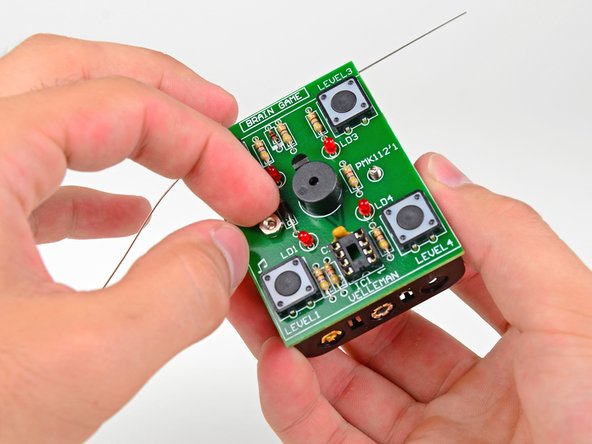
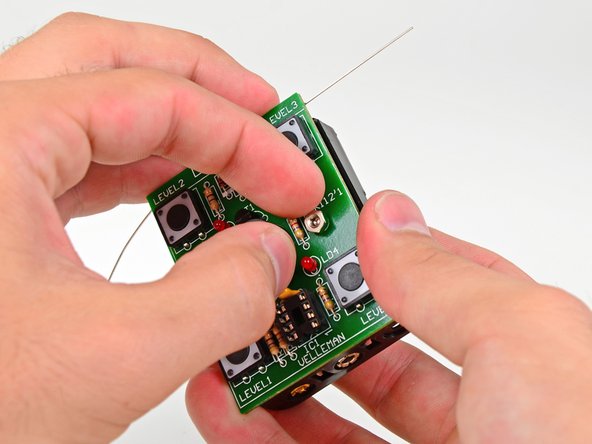
  • Continue holding the screws in place and set the circuit board on top of the battery compartment so that the two screws are fed through the holes on either side of the speaker.

  • Make sure that the top of the circuit board (the part that says Brain Game) lines up with the side of the battery compartment with three metal rings on the outside, as opposed to two.

  • Hand tighten the two nuts onto the battery compartment screws.

Blijf de schroeven op hun plaats houden en plaats de printplaat bovenop het batterijcompartiment zodat de twee schroeven door de gaten aan weerszijden van de luidspreker worden gevoerd.

Zorg ervoor dat de bovenkant van de printplaat (het deel waarop de tekst Brain Game is gedrukt) aan dezelfde kant zit als de zijkant van het batterijcompartiment met drie metalen ringen aan de buitenkant, in plaats van twee.

Draai de twee moeren met je hand op de schroeven van het batterijcompartiment vast.

crwdns2944171:0crwdnd2944171:0crwdnd2944171:0crwdnd2944171:0crwdne2944171:0