crwdns2933423:0crwdne2933423:0

Kit d'introduction à l'électronique

crwdns2936315:0crwdne2936315:0
crwdns2936317:0crwdne2936317:0
crwdns2931653:033crwdne2931653:0
Electronics Skills Kit 101: crwdns2935265:00crwdnd2935265:01crwdnd2935265:03crwdne2935265:0 Electronics Skills Kit 101: crwdns2935265:00crwdnd2935265:02crwdnd2935265:03crwdne2935265:0 Electronics Skills Kit 101: crwdns2935265:00crwdnd2935265:03crwdnd2935265:03crwdne2935265:0
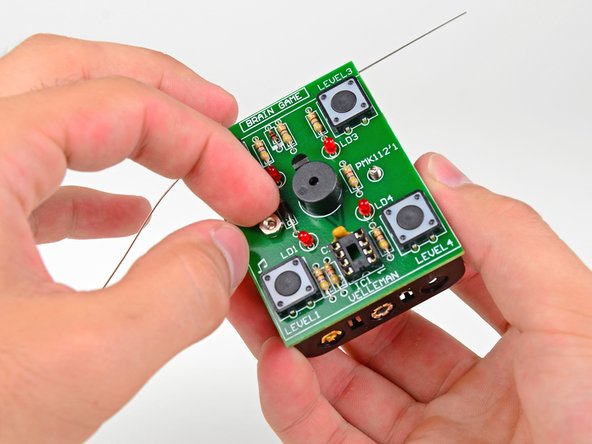
  • Continue holding the screws in place and set the circuit board on top of the battery compartment so that the two screws are fed through the holes on either side of the speaker.

  • Make sure that the top of the circuit board (the part that says Brain Game) lines up with the side of the battery compartment with three metal rings on the outside, as opposed to two.

  • Hand tighten the two nuts onto the battery compartment screws.

Continuez de tenir les vis en place et placez la carte mère sur le dessus du compartiment à piles de manière à positionner les deux vis dans les trous de la carte, de chaque côté du haut-parleur.

Orientez bien le compartiment : il faut que le haut de la carte (la partie où est écrit "BRAIN GAME") soit du même côté que le côté du compartiment où il y a trois anneaux métalliques (et pas deux).

Serrez à la main les deux écrous sur les vis du compartiment à piles.

crwdns2944171:0crwdnd2944171:0crwdnd2944171:0crwdnd2944171:0crwdne2944171:0