crwdns2933423:0crwdne2933423:0

Electronics Skills Kit 101

crwdns2936315:0crwdne2936315:0
crwdns2936321:0crwdne2936321:0
crwdns2931653:028crwdne2931653:0
Electronics Skills Kit 101: crwdns2935265:00crwdnd2935265:01crwdnd2935265:03crwdne2935265:0 Electronics Skills Kit 101: crwdns2935265:00crwdnd2935265:02crwdnd2935265:03crwdne2935265:0 Electronics Skills Kit 101: crwdns2935265:00crwdnd2935265:03crwdnd2935265:03crwdne2935265:0
  • No, you weren't ripped off; those two leads aren't supposed to have any components in the middle of them.

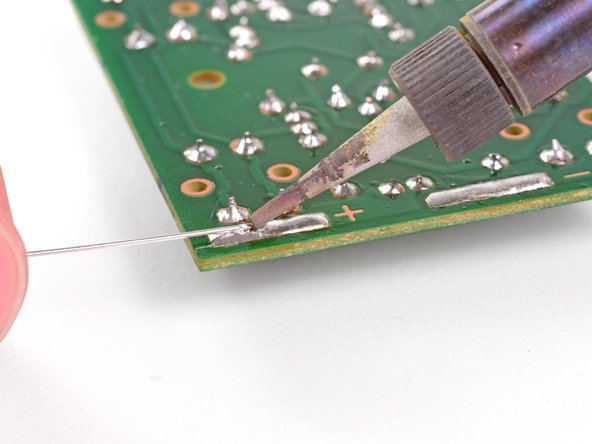
  • To solder the battery leads to the circuit board, set the tip of the soldering iron on the solder that's on the positive pad.

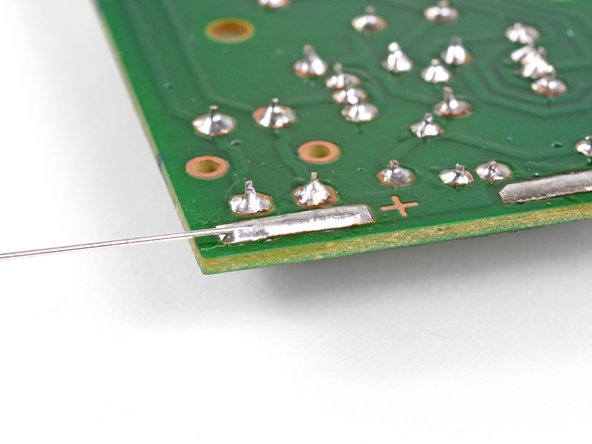
  • When the solder begins to melt again, quickly insert the end of the lead into the melted solder so that the lead hangs off the side of the board, as shown.

  • The leads will heat up and may burn you if you hold them near the soldering iron for more than a few seconds.

  • Remove the soldering iron and let the solder cool around the lead.

  • You can melt the solder again or add more solder if you don't get it right the first time.

No, non ti hanno fregato: queste due gambe non devono avere alcuna componente nel mezzo.

Per saldare le gambe della batteria alla scheda logica, appoggia la punta del saldatore sulla saldatura del polo positivo.

Quando la saldatura si scioglie, inseriscici velocemente la gamba nella saldatura in modo che sporga come dalla scheda, come mostrato.

Le gambe si scalderanno e potresti scottarti se le tieni da vicino al saldatore per più di qualche secondo.

Rimuovi il saldatore e lascia raffreddare la saldatura attorno alla gamba.

Puoi sciogliere ancora la saldatura o aggiungerne se non ci sei riuscito al primo tentativo.

crwdns2944171:0crwdnd2944171:0crwdnd2944171:0crwdnd2944171:0crwdne2944171:0